Creating Dynamic Data
Dynamic Data collections, such as Articles, are form-based content types that editors find under Data in the Visor Studio sidebar. Every collection in that folder uses the same list, create and edit screens. Adding a new content type doesn’t need any frontend code. It takes two parts:
- In DaaS Studio, create the collection and its fields.
- In Visor Studio, make the collection visible for a site and assign it a workflow.
When you finish, editors can open the collection from the sidebar, create items and publish them through the workflow.
Prerequisites
- Admin access to DaaS Studio, so you can create collections, fields and permissions.
- An Admin role in Visor Studio. Only admins can open the Settings modules.
- The site (team) the collection is for. Visibility and workflow assignments are set per site.
- A Workflow Definition for that site, for example the Ideal Workflow (Start → Draft → Pending Approval → Published).
Part 1: Create the Collection in DaaS Studio
Create the collection with the right name
Open the Data Model page and create a new collection. Use a UUID primary key, and choose a name that follows these rules:
| Rule | Example | Why |
|---|---|---|
Start with xtr_cms_data_ | xtr_cms_data_news_detail | Visor Studio only treats collections with this prefix as Dynamic Data. |
Use lowercase snake_case | xtr_cms_data_products_detail | Matches every existing collection. |
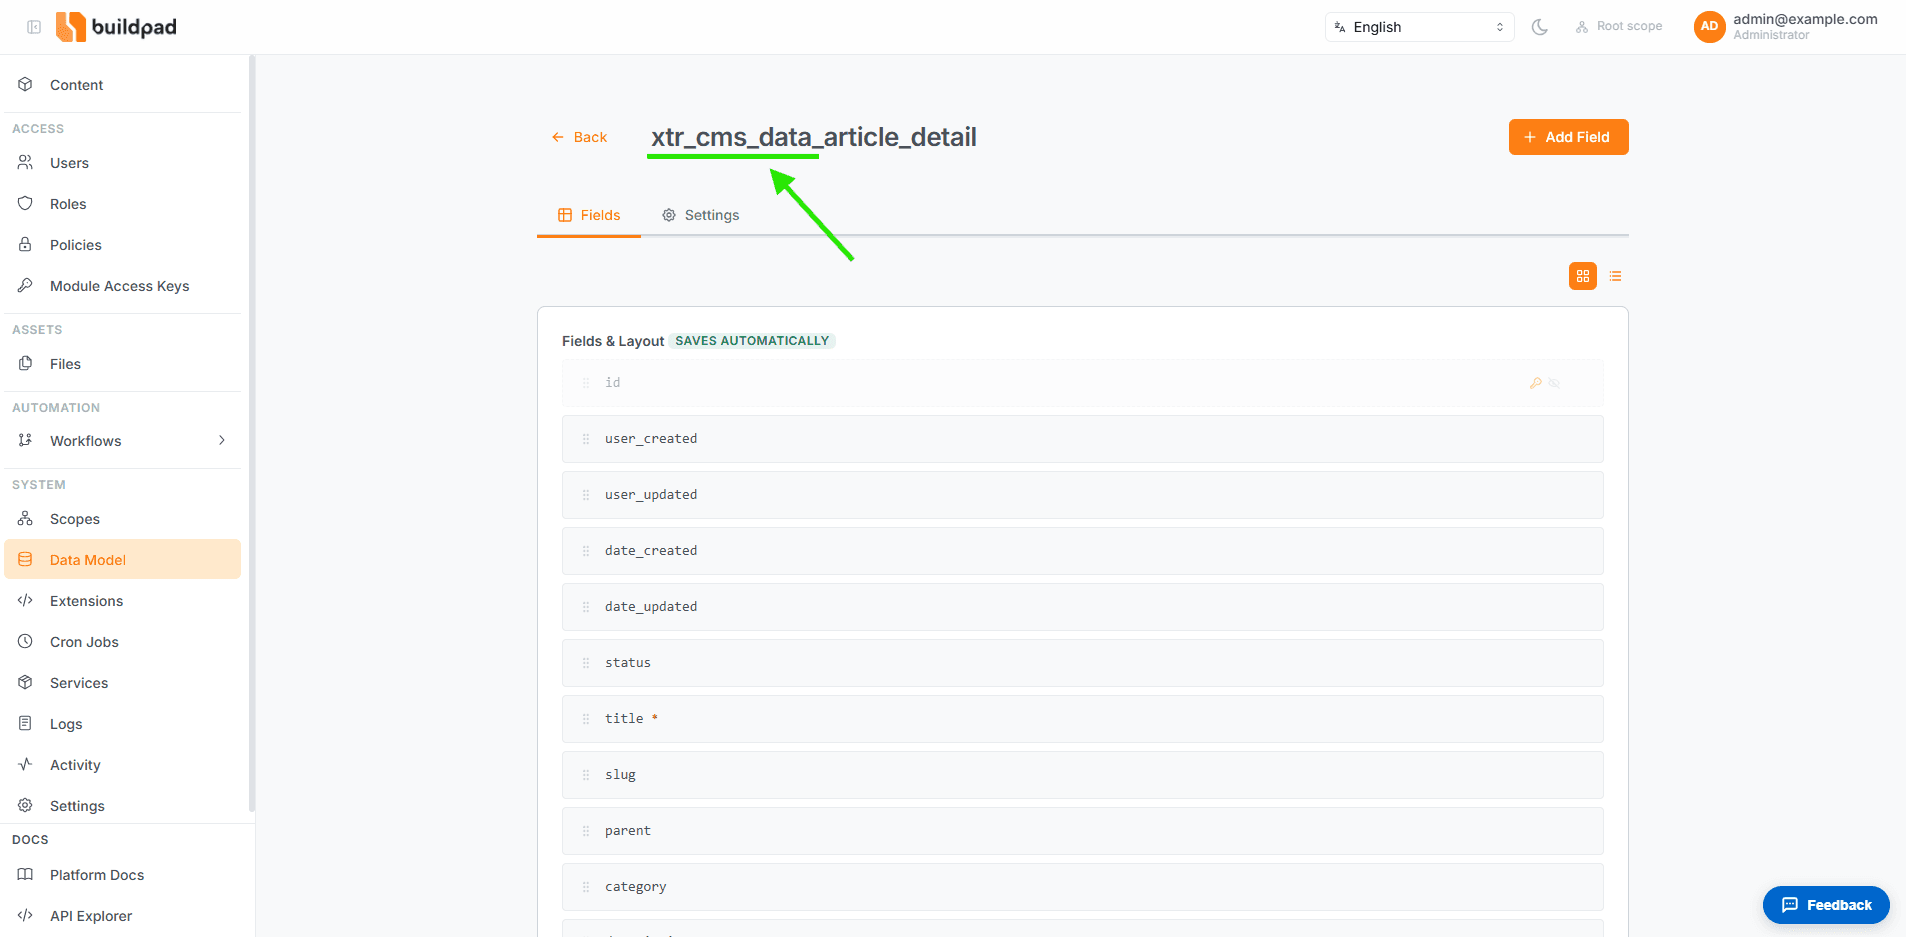
Don’t end the name with _translations or start it with daas_. Those names are reserved, and the sidebar never shows them.
Put it in the Data folder and give it a label
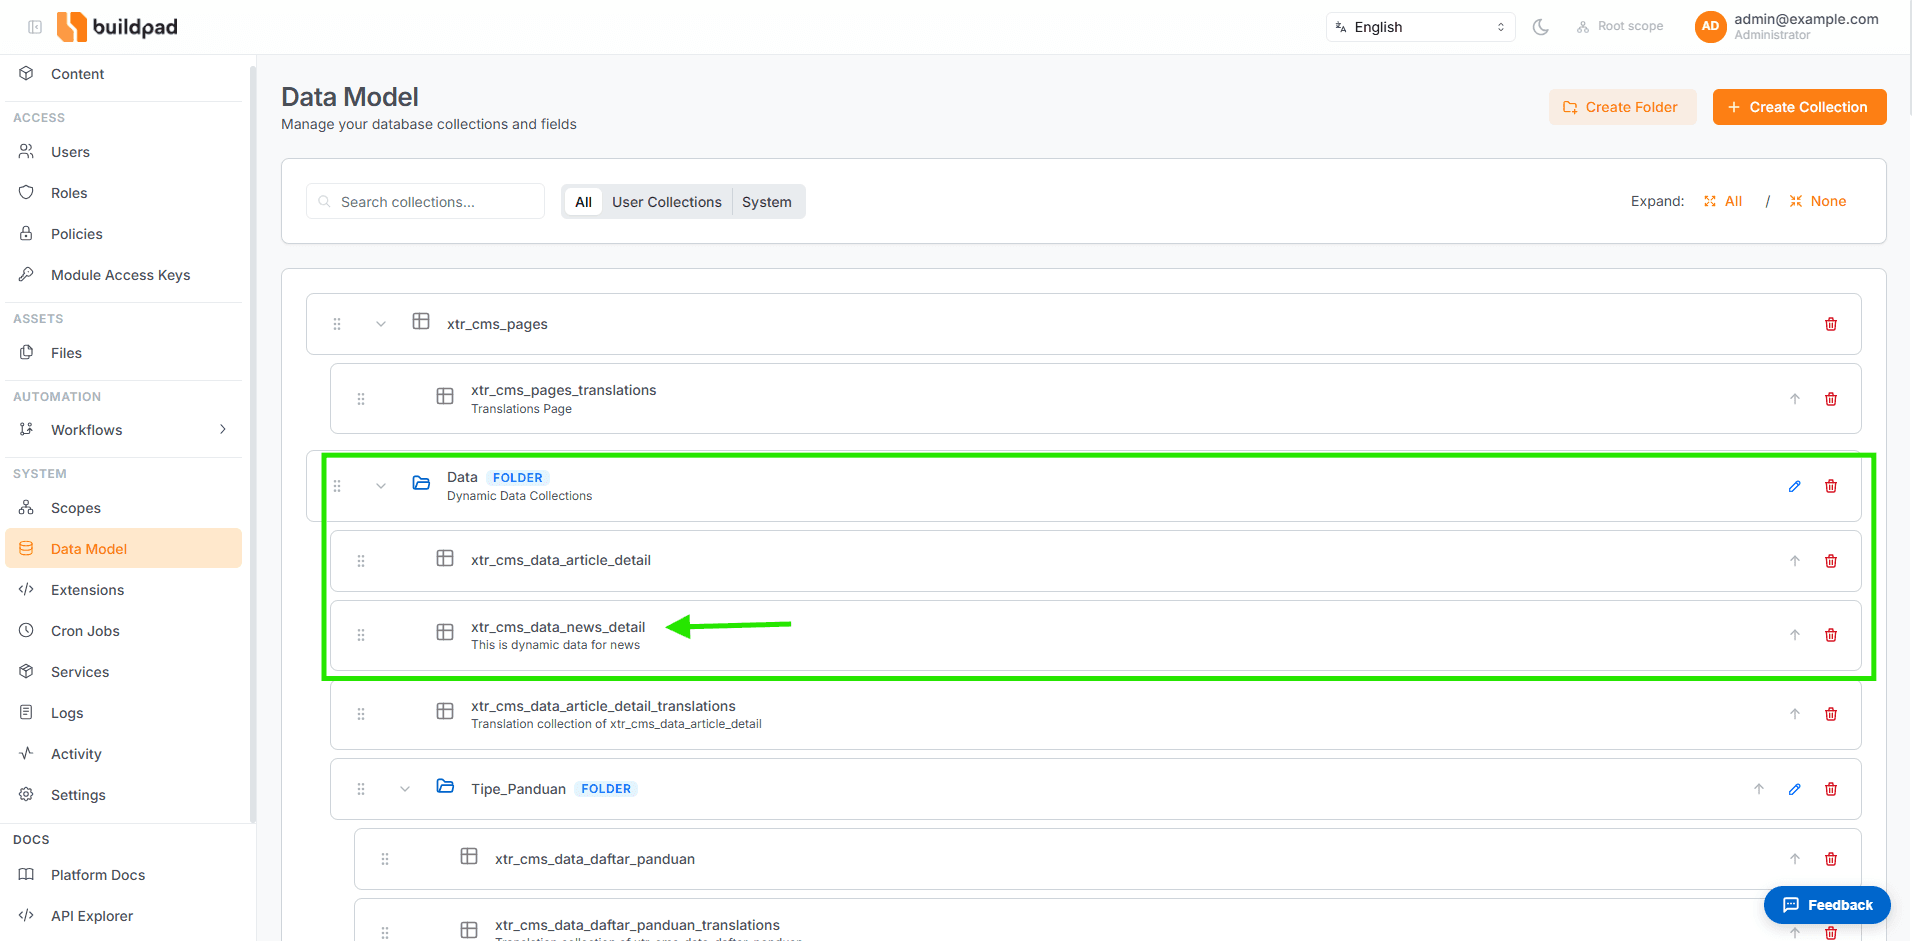
In the collection settings, set:
| Setting | Value | If you skip it |
|---|---|---|
| Group / Folder | Data | The collection appears as a top-level sidebar item instead of under Data. |
Translation (en-US) | The label for the sidebar, e.g. Products | The sidebar shows the raw name, xtr_cms_data_product. |
| Icon | A Lucide icon name, e.g. package | No icon appears. Material icon names such as inventory_2 don’t work. |
| Hidden | Off | The collection doesn’t appear. |
Add the standard fields
DaaS Studio doesn’t create these fields for you. Dynamic Data needs all of them:
| Field | Type | Interface | Notes |
|---|---|---|---|
user_created, user_updated | uuid | - | Special: user-created / user-updated. |
date_created, date_updated | timestamp | - | Special: date-created / date-updated. |
status | string | xtr-interface-workflow | Holds the workflow state. It must be named status. |
team | uuid, many-to-one → xtr_cms_teams | select-dropdown-m2o | Hidden. Keeps each site’s items separate. |
workflow_instance | uuid, many-to-one → daas_wf_instance | select-dropdown-m2o | Hidden and read-only. Links the item to its workflow. |
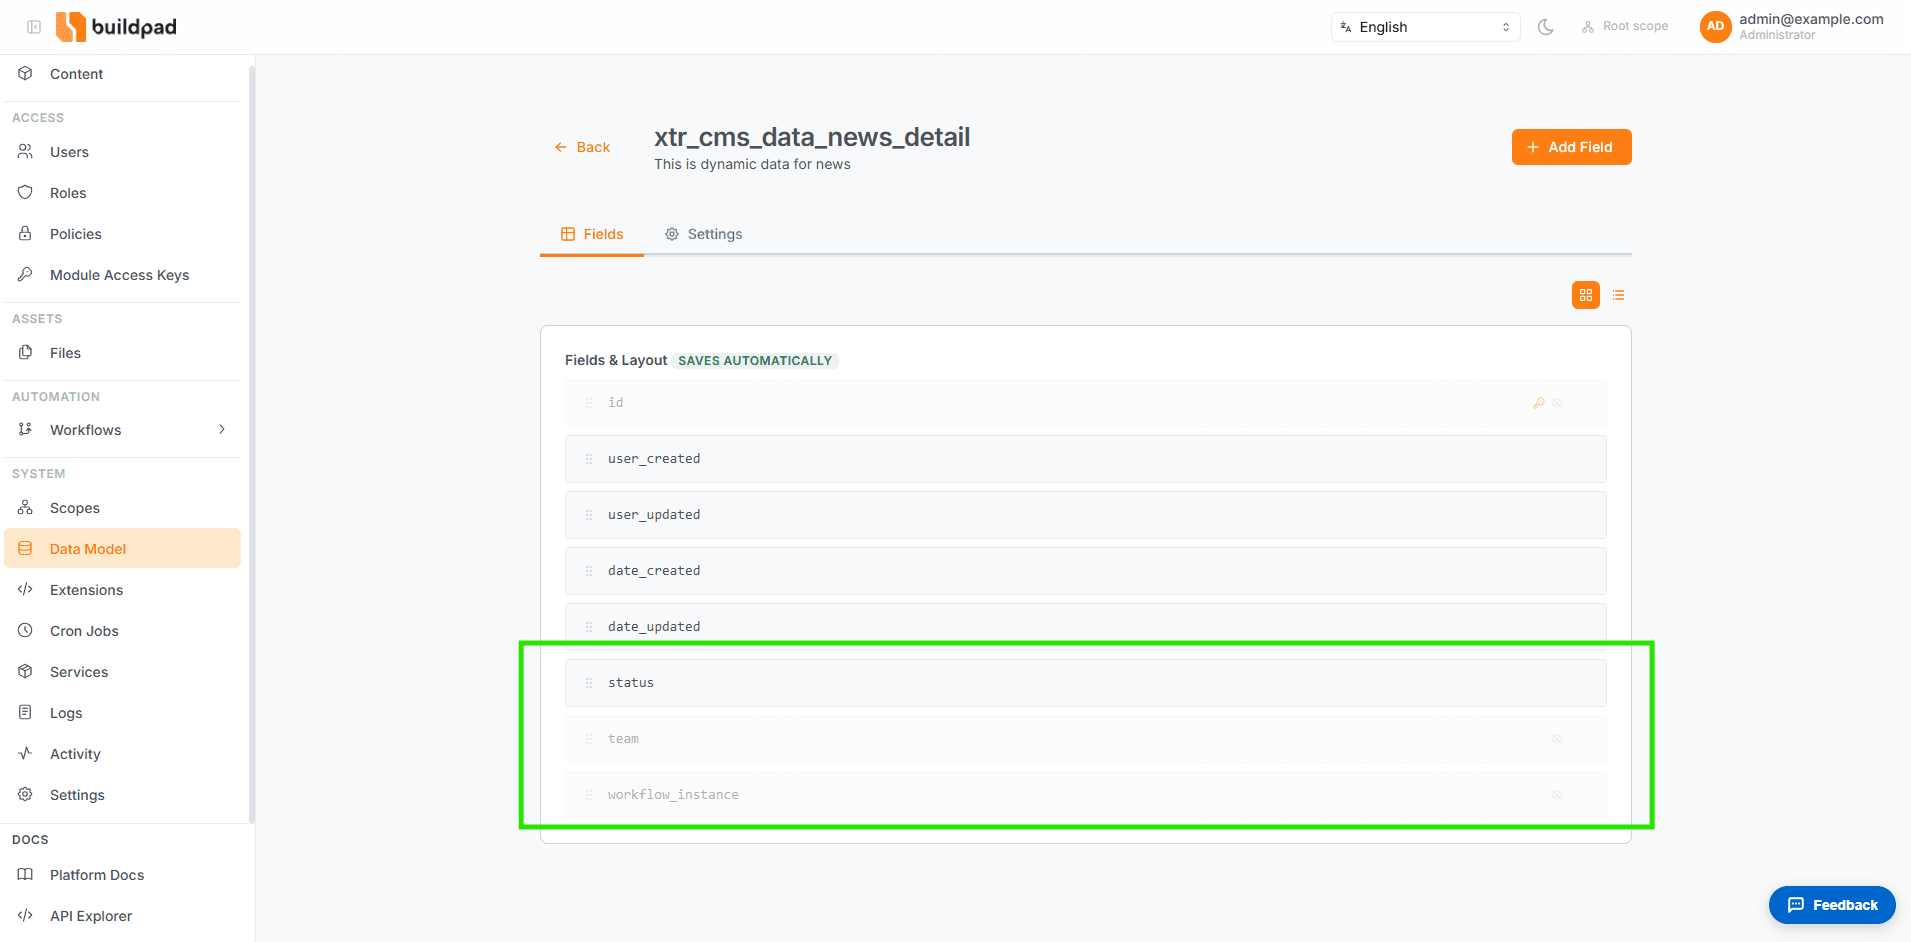
Without a team field, every site sees the same items. Visor Studio scopes reads and creates to the active site only when the collection has team.
Add your content fields
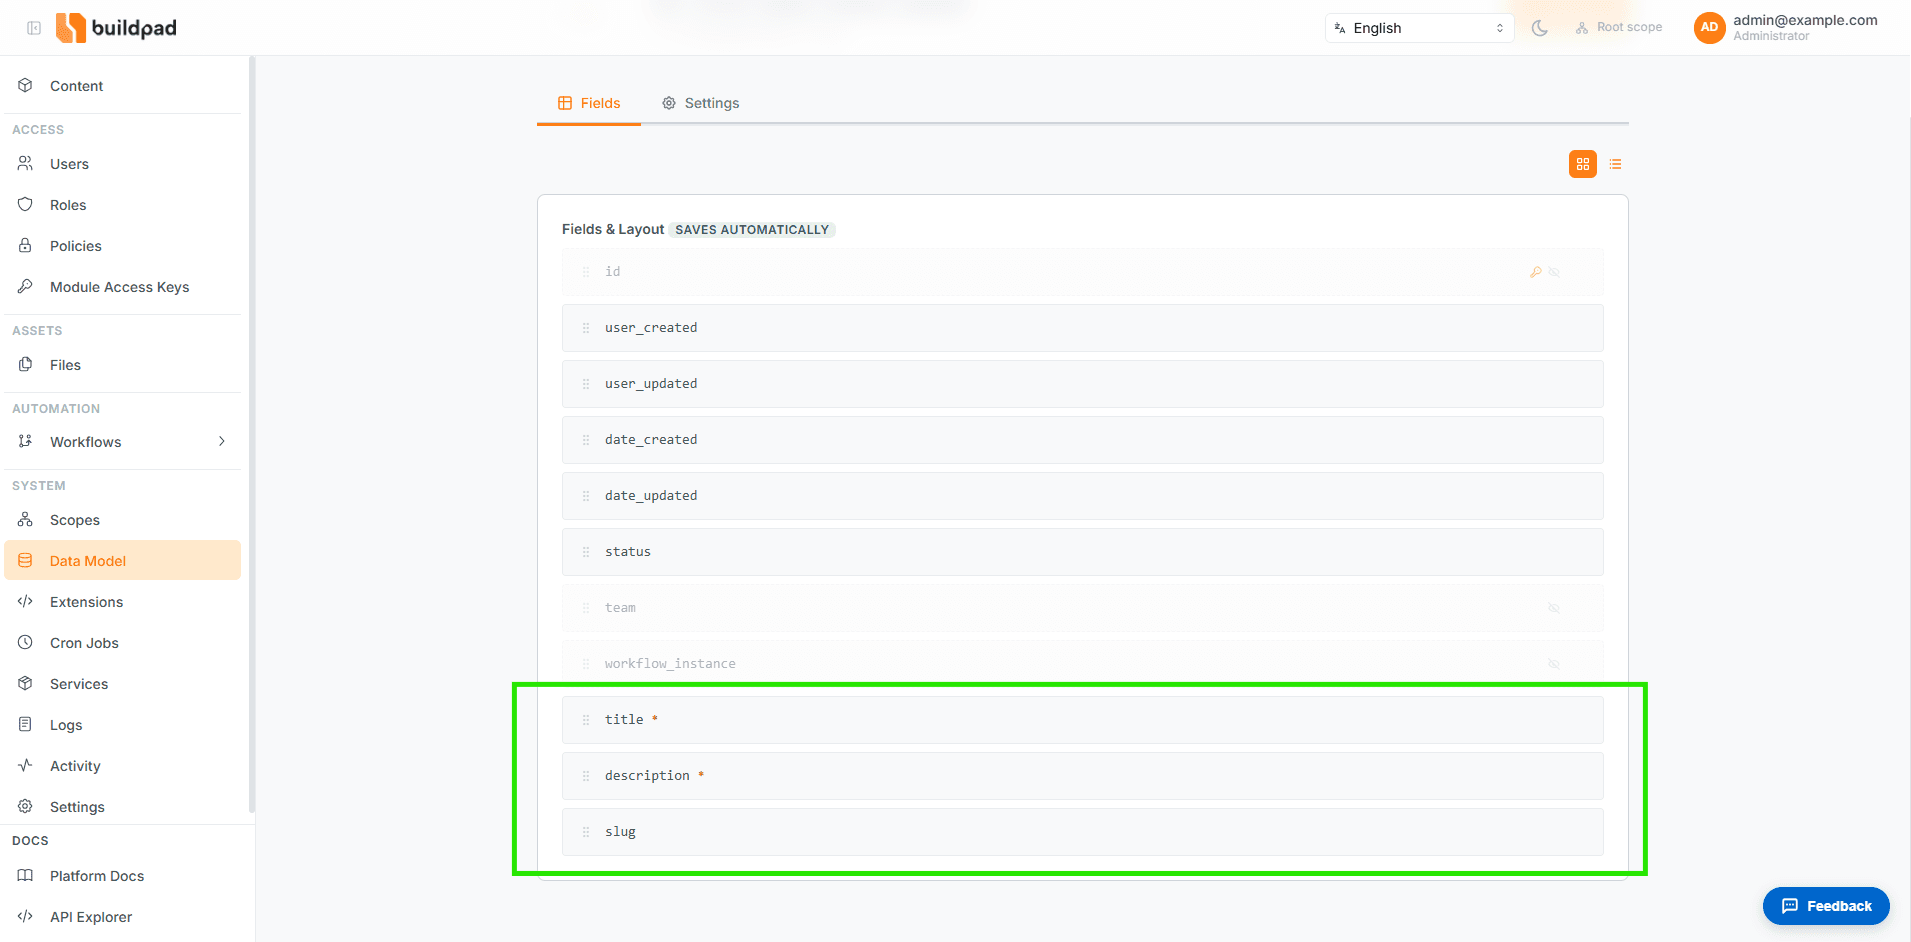
Add the fields editors will fill in. Common choices:
| Use case | Type | Interface |
|---|---|---|
| Short text (title) | string | input |
| Long plain text | text | input-multiline |
| Rich text | text | input-rich-text-html |
| Choice list | string | select-dropdown |
| Yes / no | boolean | boolean |
| Date and time | timestamp | datetime |
| Image | uuid | file-image |
- Set a sort order on every field so the form shows them in the order you want.
- Mark mandatory fields as Required.
- If the collection has both
titleandslug, the slug is generated from the title automatically.
Grant permissions for non-admin roles
Admins can skip this step. Other roles can’t see the collection until one of their policies has a read permission on it. Give editors create, update and delete as well.
To limit users to their own site’s items, use this filter on the permission:
{ "team": { "_in": ["$CURRENT_USER.xtr_cms_teams.xtr_cms_teams_id.id"] } }Part 2: Make It Visible and Assign a Workflow in Visor Studio
Select the site
Use the site switcher in the top-left corner to select the site that should get the collection. The workflow assignment you create in this part applies to the site selected here.
Add the collection to Visible Collections
Click your account name in the top-right corner and select Settings. Click Sites in the sidebar, then open the site from the listing.
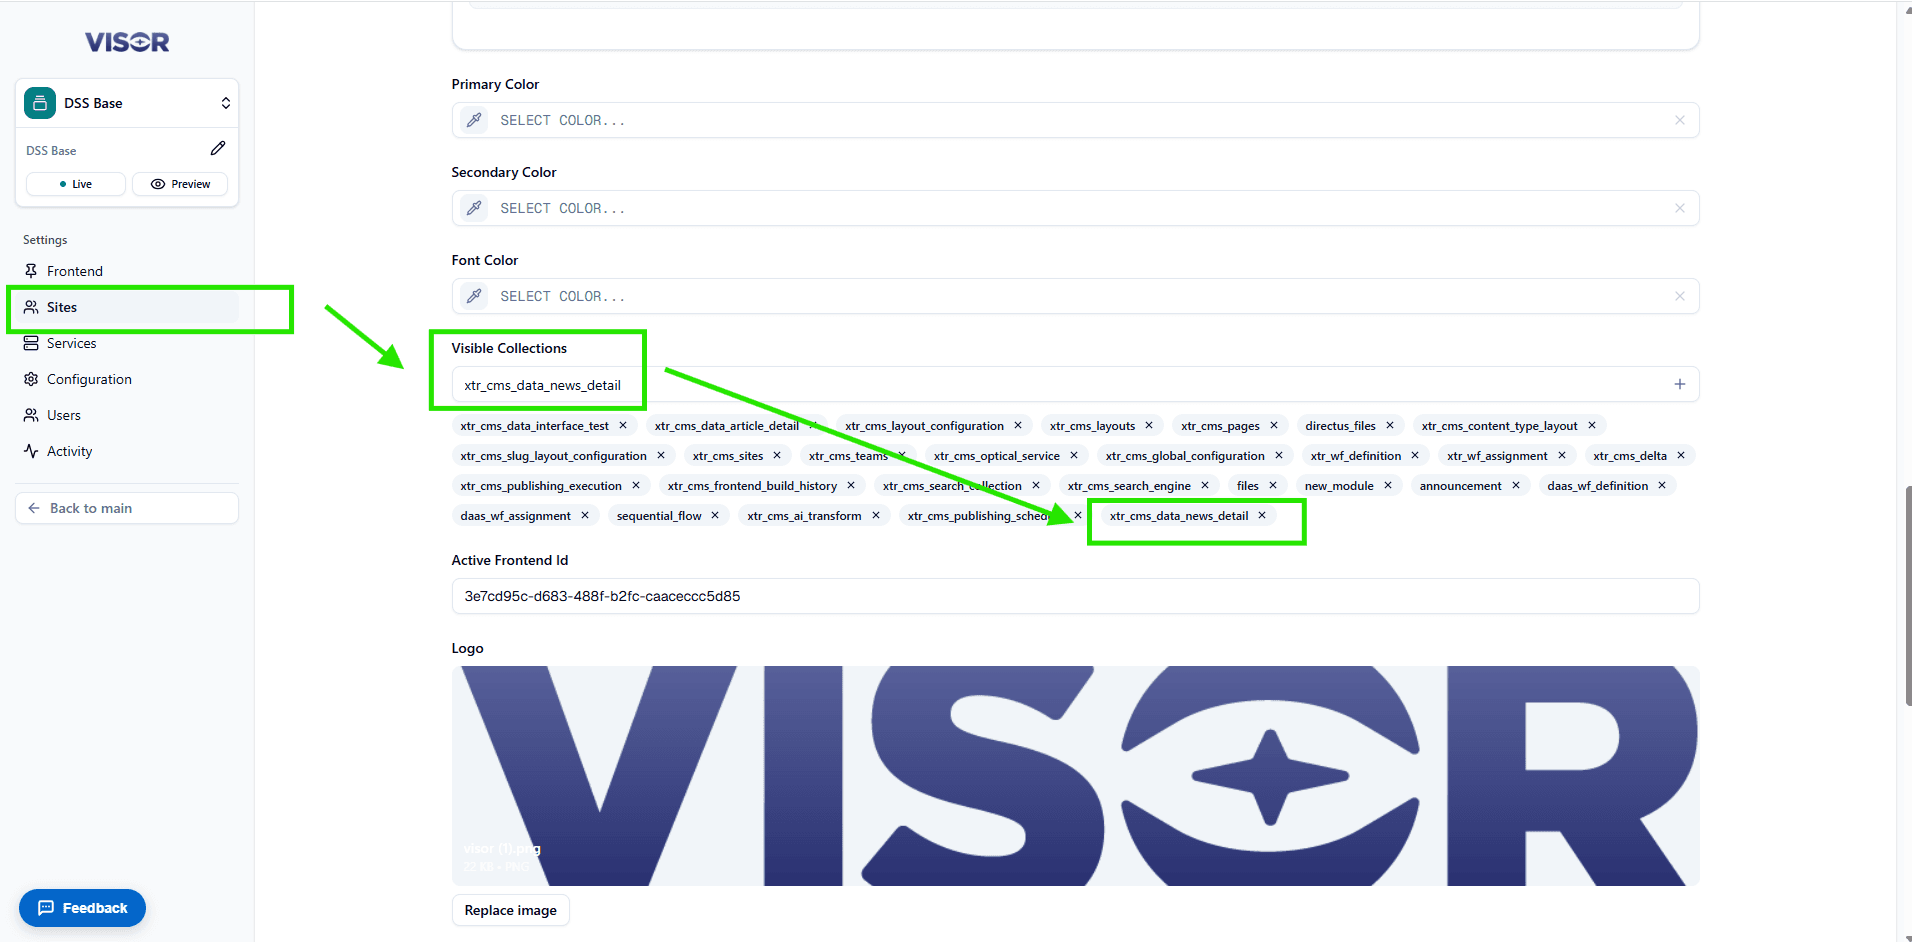
In Visible Collections, type the collection name exactly (for example xtr_cms_data_product) and click +. Then click the save button in the top-right corner.
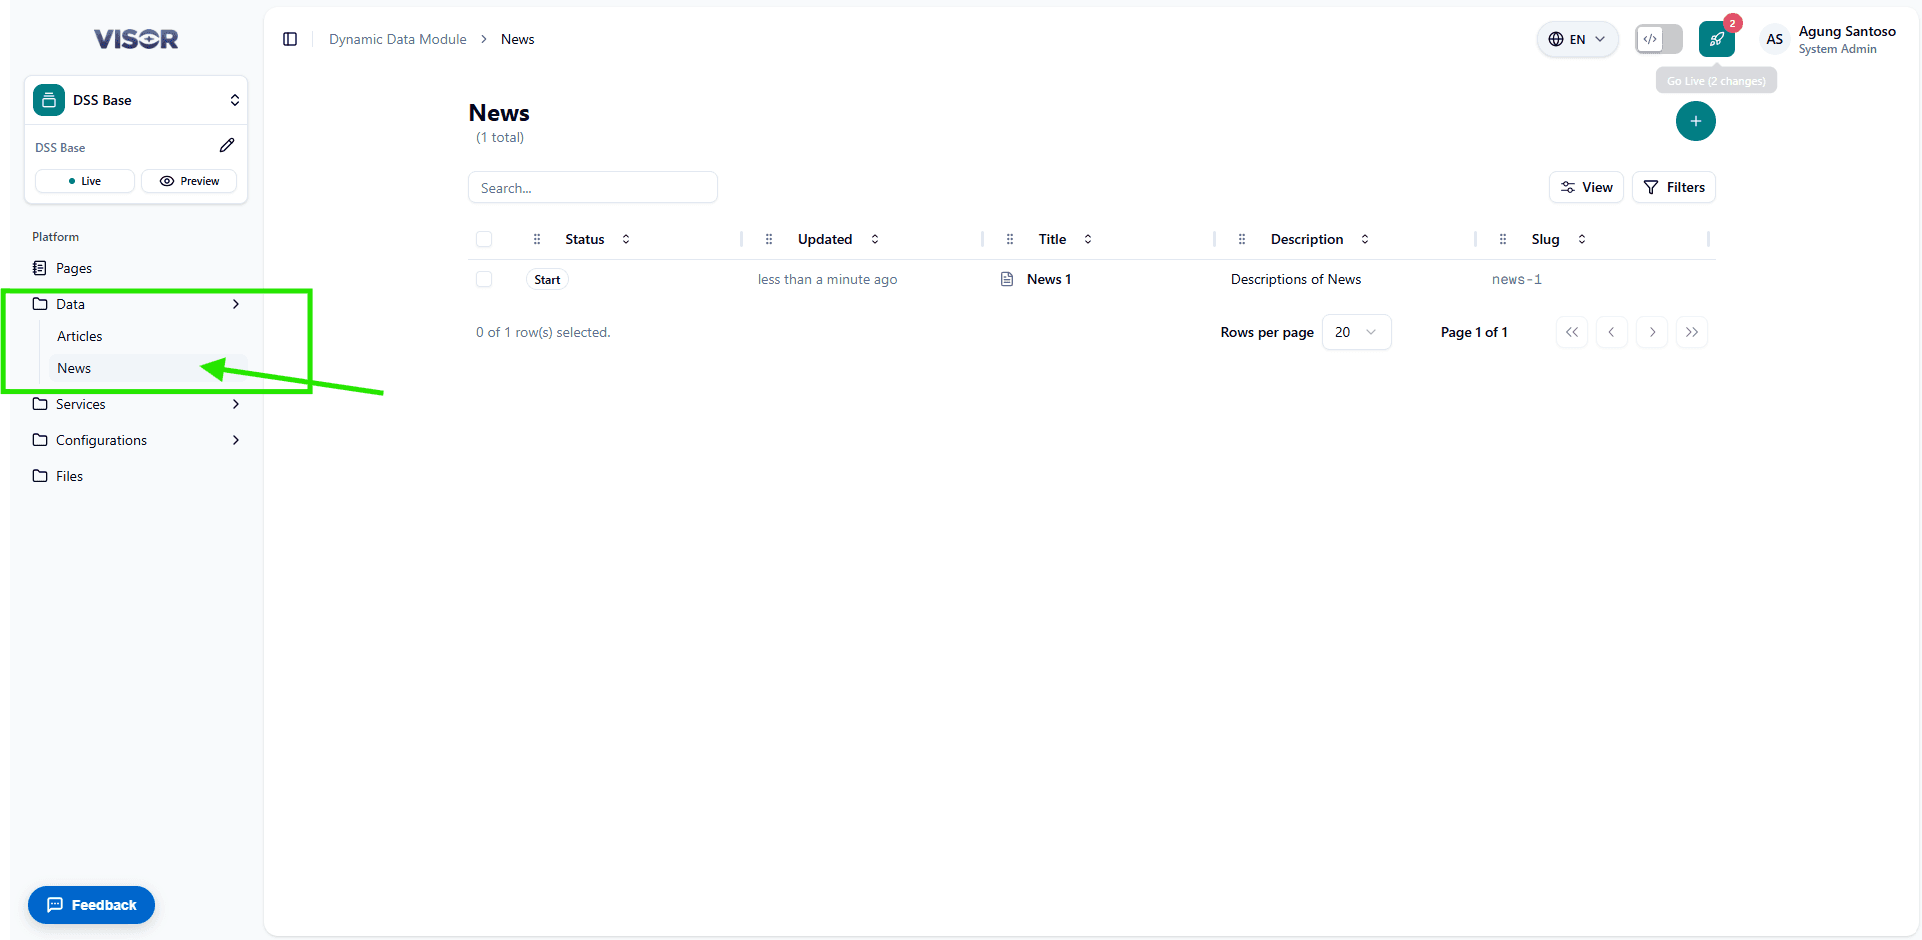
Visible Collections is set per site. Repeat this step for every site that should see the collection. A site cloned from another one only copies the list as it was at the time of cloning.
Assign a workflow
In the left sidebar, go to Services → Workflow → Workflow Assignment and click +.
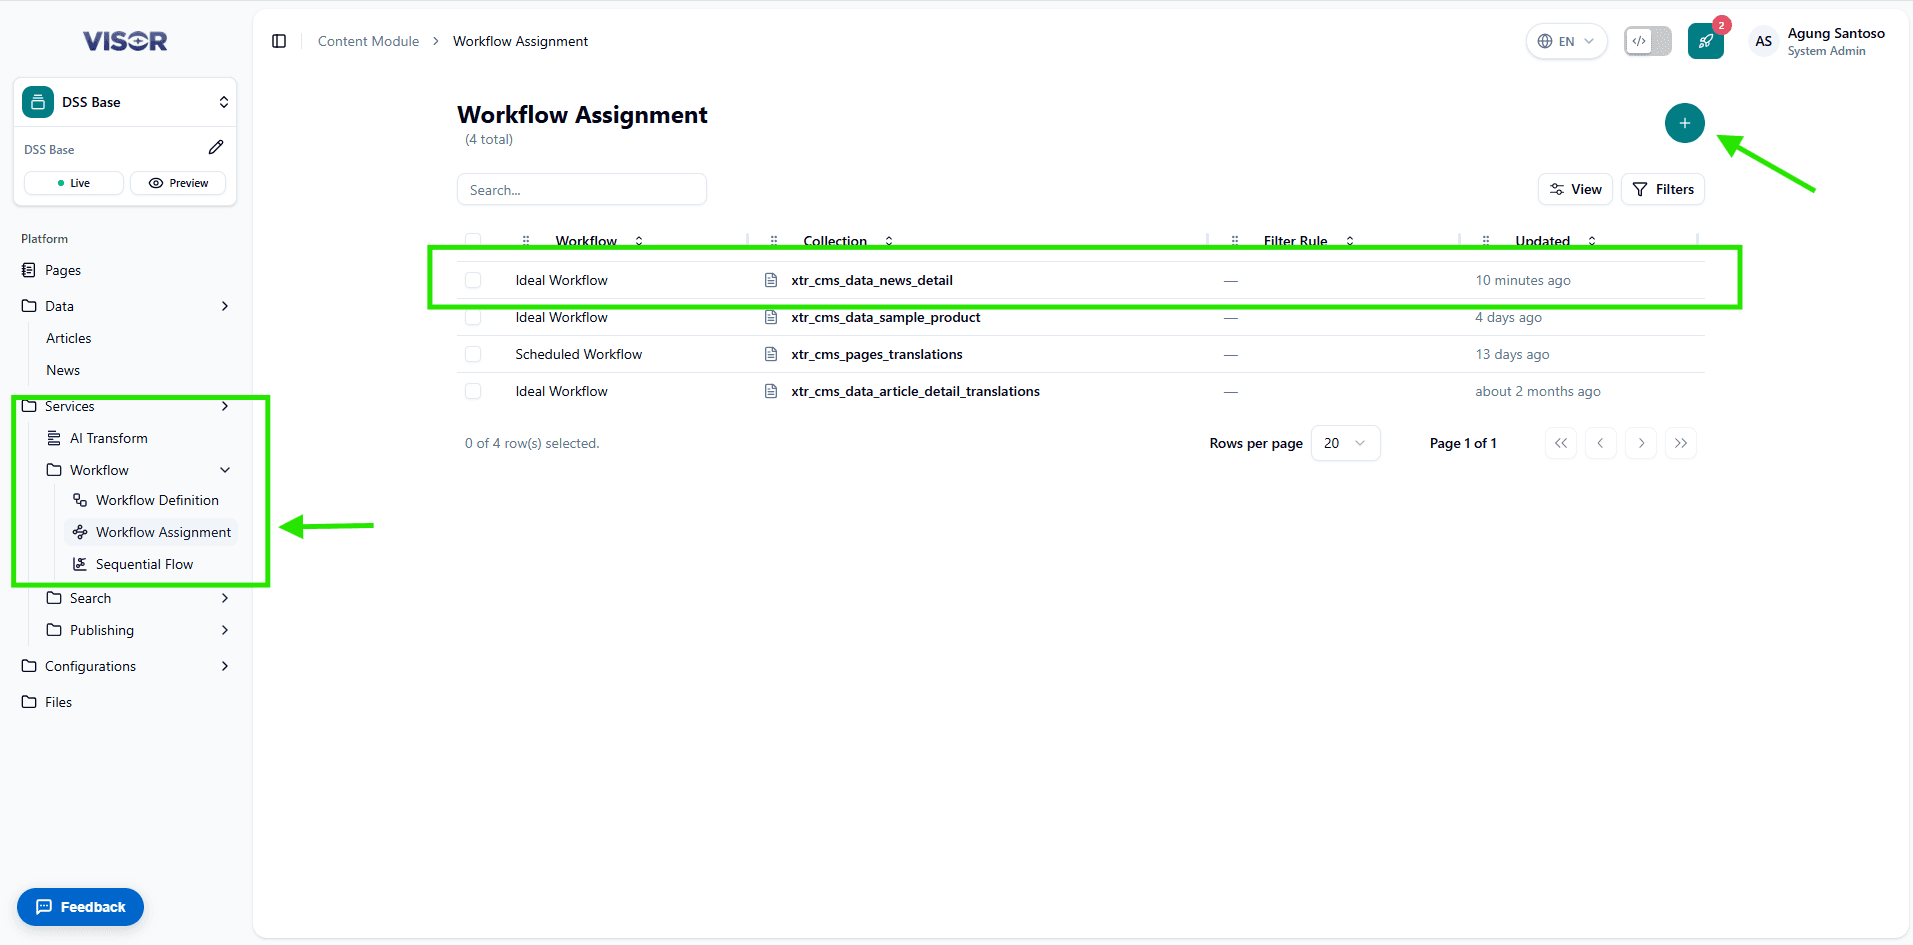
| Field | Value |
|---|---|
| Workflow | The site’s workflow definition, e.g. Ideal Workflow. |
| Collection | Your new collection. |
| Filter Rule | Leave blank. |
Click the ✓ (check) button to save. See Workflow Assignment for more details.
Without a workflow assignment, new items are saved as draft with no versions and no publish flow. Create one assignment per collection per site. If there are more, only the first one is used.
Check the result
Open Data in the sidebar. The collection appears with its label. Click +, fill in the form and save. If everything is set up correctly, the item opens as version 1 with the status Start, ready to move through the workflow.
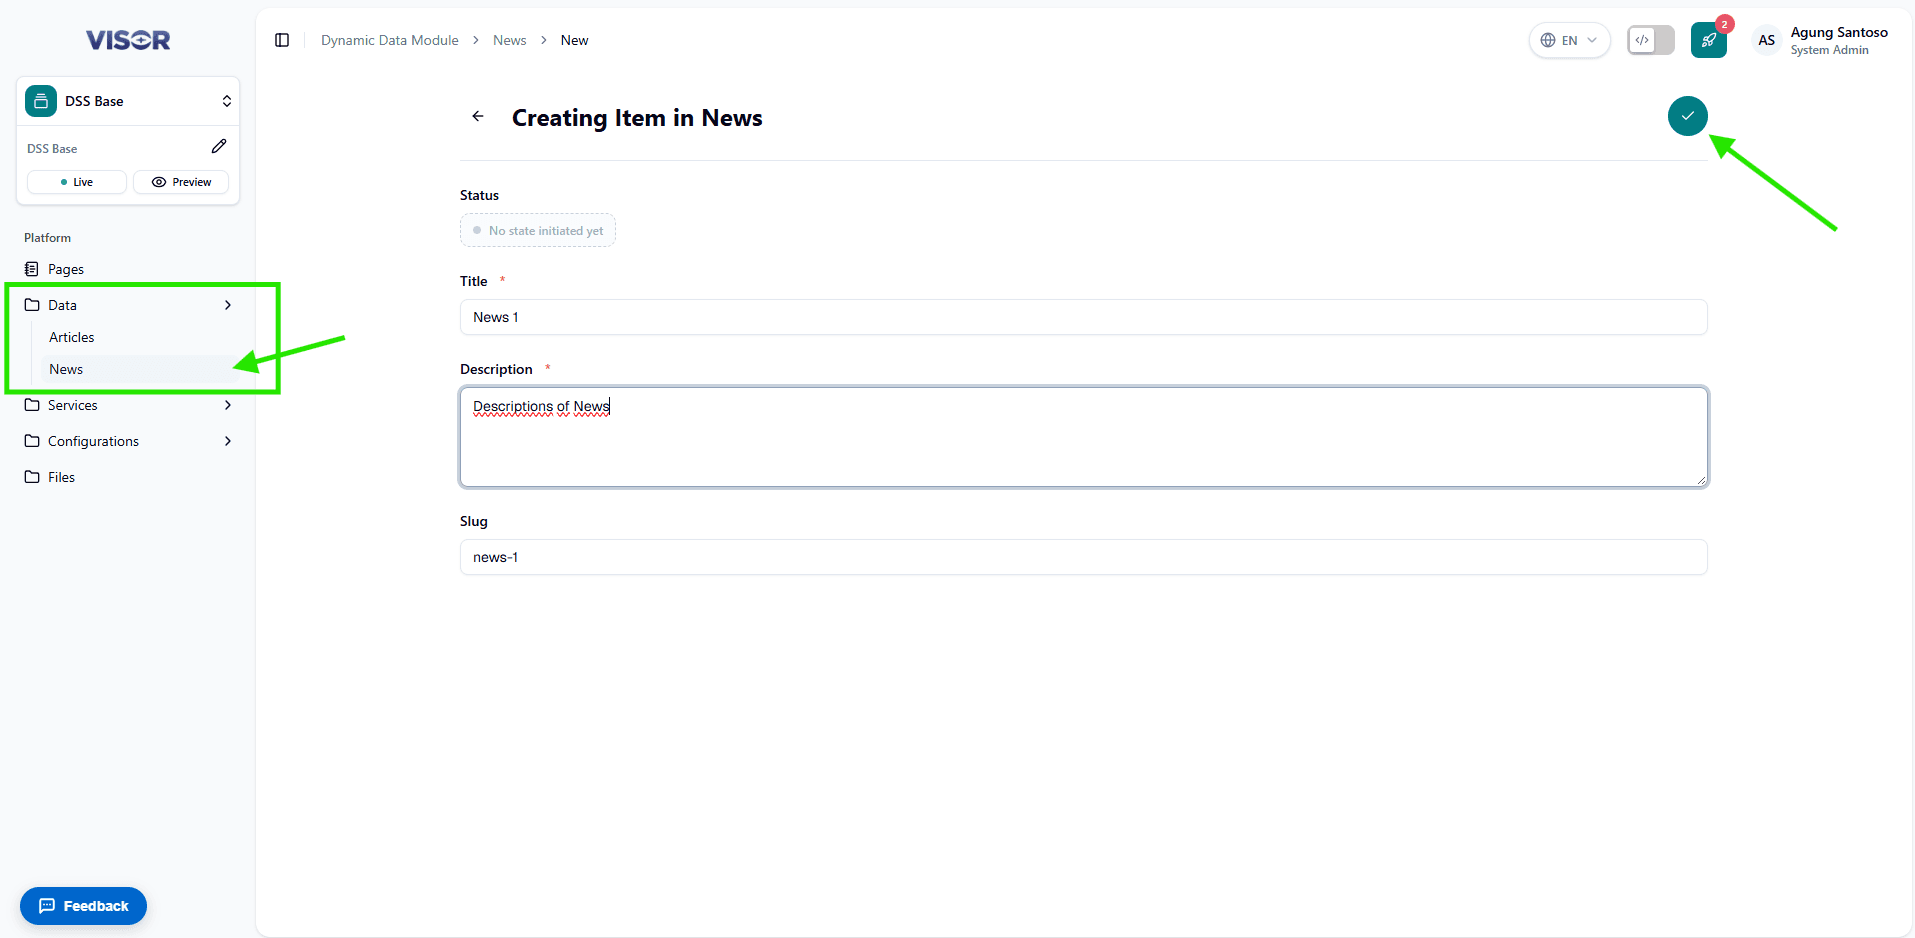
Log in once with a non-admin role as well to confirm that the permissions from Part 1 work.
Troubleshooting
| Symptom | Fix |
|---|---|
| Collection doesn’t appear for anyone | Add it to the site’s Visible Collections (Part 2). |
| Collection is missing only for non-admin users | Add a read permission for their role (Part 1, last step). |
| Collection appears as a top-level item, not under Data | Set the collection’s group to Data in DaaS Studio. |
Sidebar shows xtr_cms_data_... instead of a label | Add an en-US translation to the collection in DaaS Studio. |
New items are draft and have no versions | Create a Workflow Assignment for this site and collection. |
| Every site sees the same items | Add the team field (Part 1, standard fields). |