Dynamic Data
The Dynamic Data module is used to store and manage structured content collections that frontend heads consume via the Visor API. Unlike the Page Builder, which is designed around page layout and widgets, Dynamic Data works as a straightforward form-based data store — editors fill in fields, save entries, and publish them when ready.
Predefined Collection: Articles
The module ships with one predefined collection: Articles. This collection is designed to hold editorial content organised by category.
| Category | Description |
|---|---|
| News | Time-sensitive announcements and updates. |
| Blog | Insight and thought-leadership content. |
| Case Study | Implementation stories and outcomes. |
| Media Release | Official media and press communications. |
Each article entry contains the following fields:
| Field | Required | Notes |
|---|---|---|
| Title | Yes ★ | The display title of the article. |
| Slug | No | URL-friendly identifier. Auto-generated from the title if left blank. |
| Category | No | One of the four predefined categories above. |
| Description | No | Short summary; supports rich text (bold, italic, underline, inline code). |
| Content | No | Full article body; supports rich text. |
Articles Listing
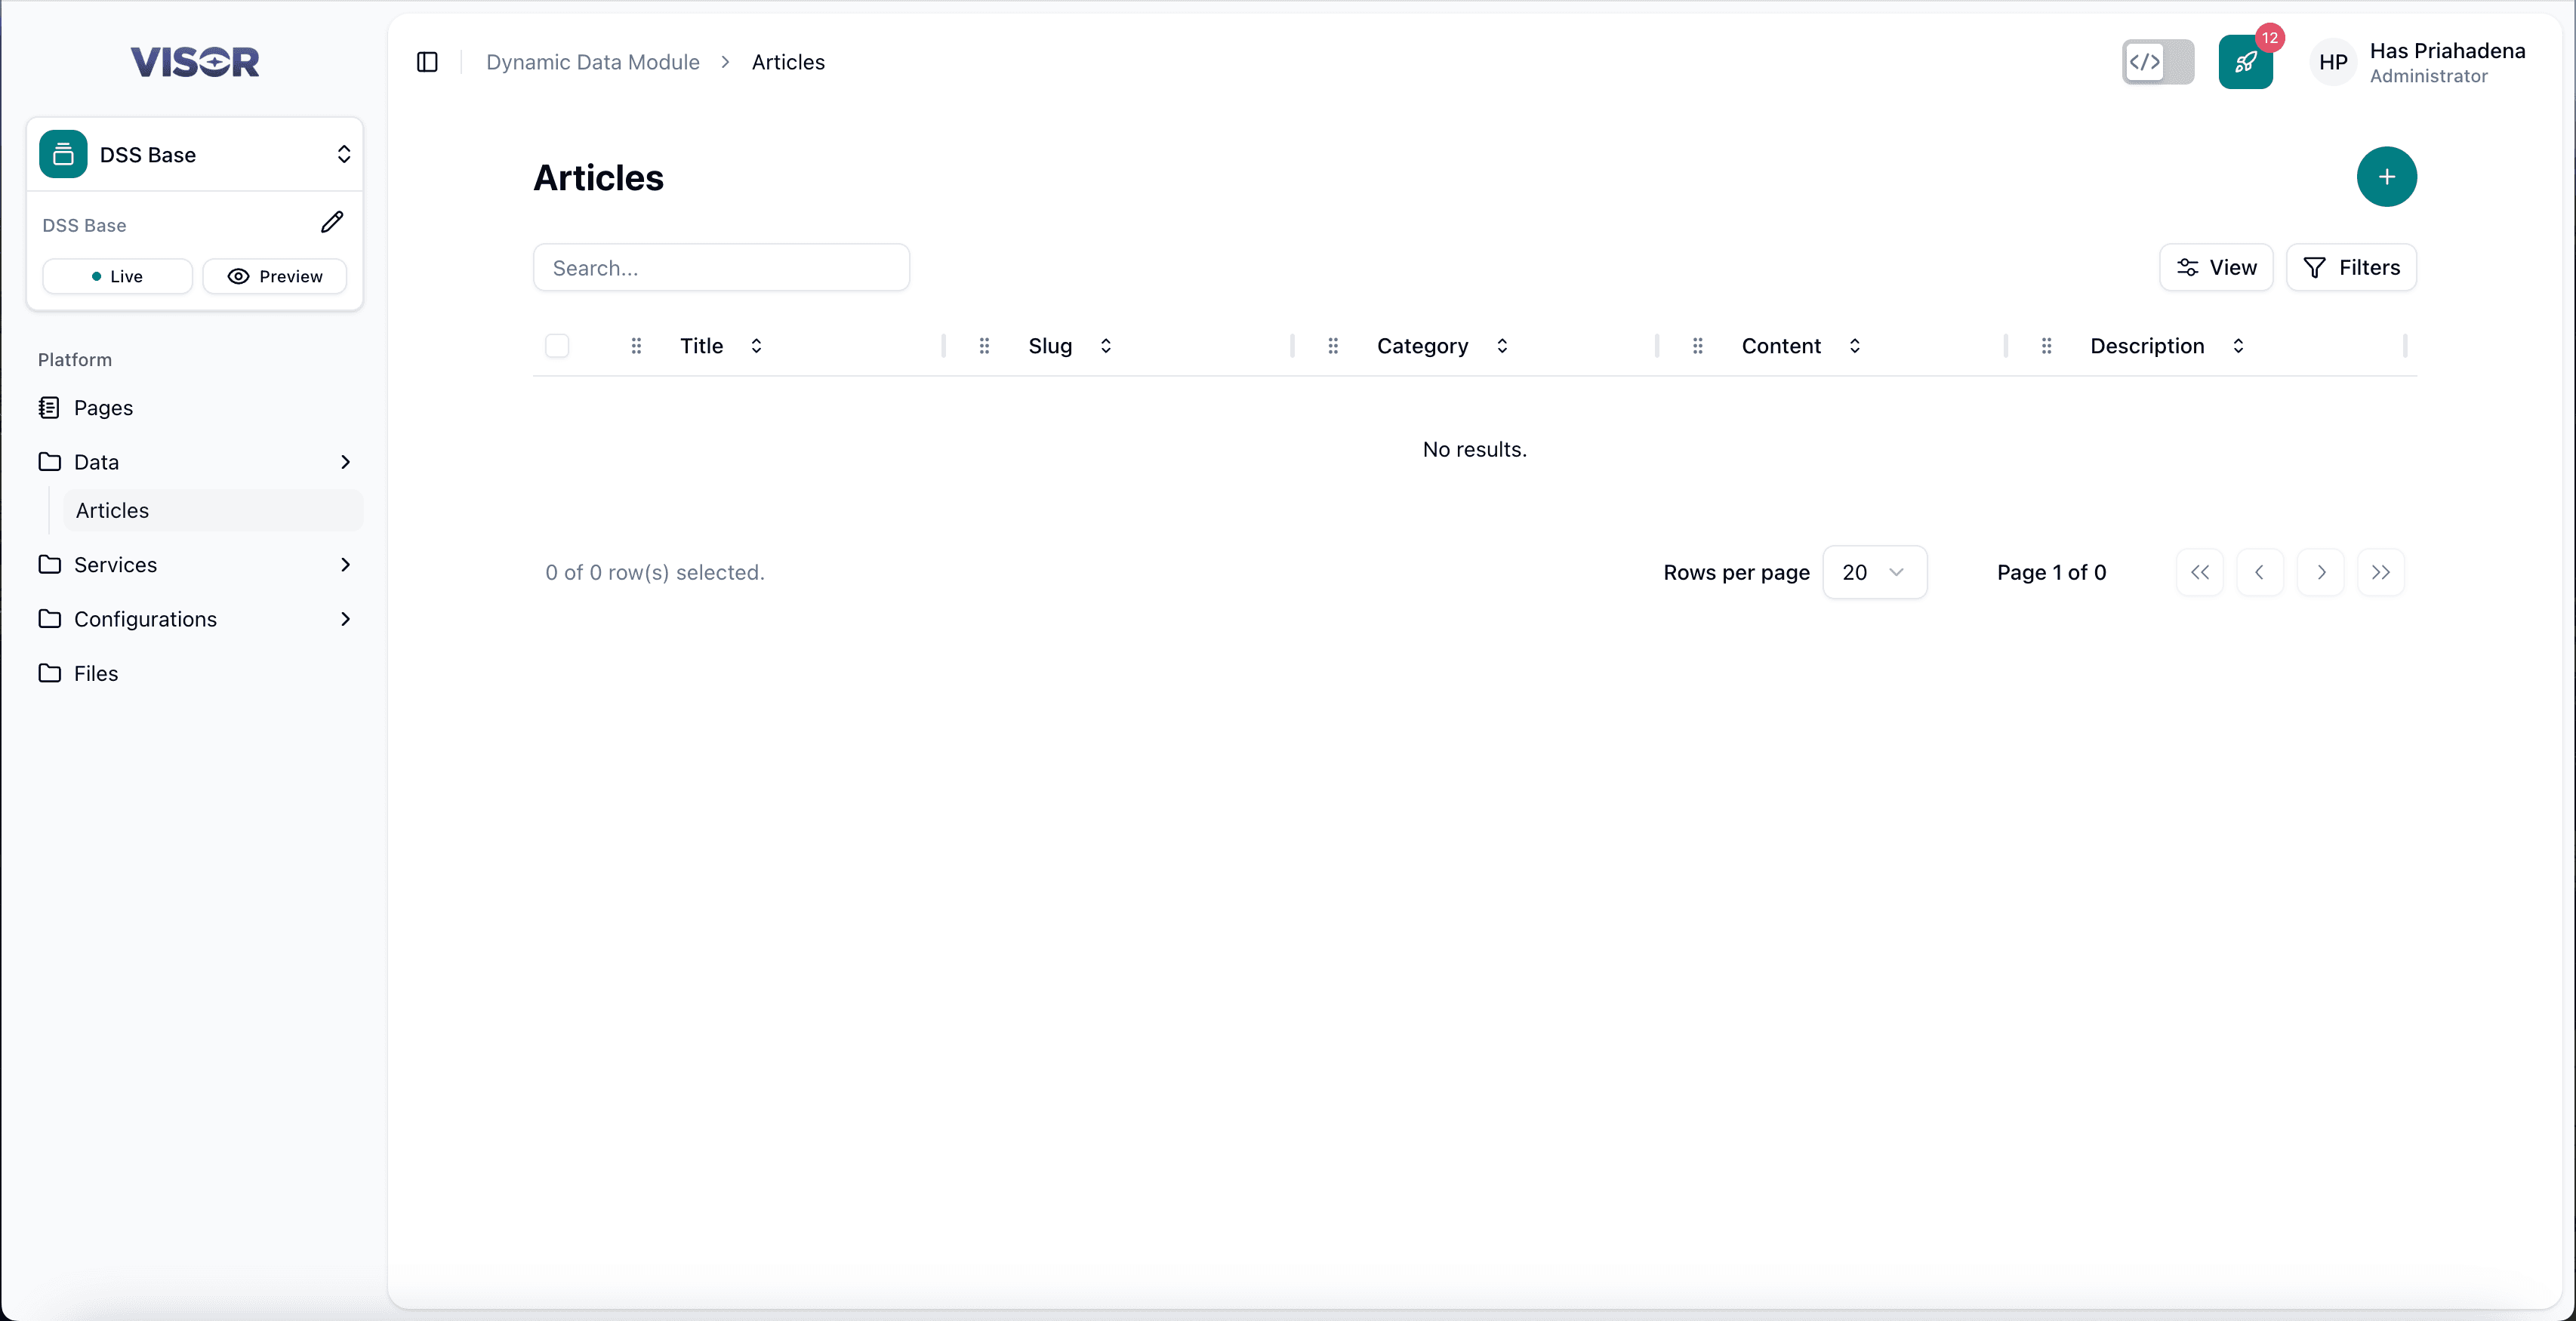
Navigate to Data → Articles in the left sidebar. This opens the Articles listing page, which displays all existing article entries in a table.
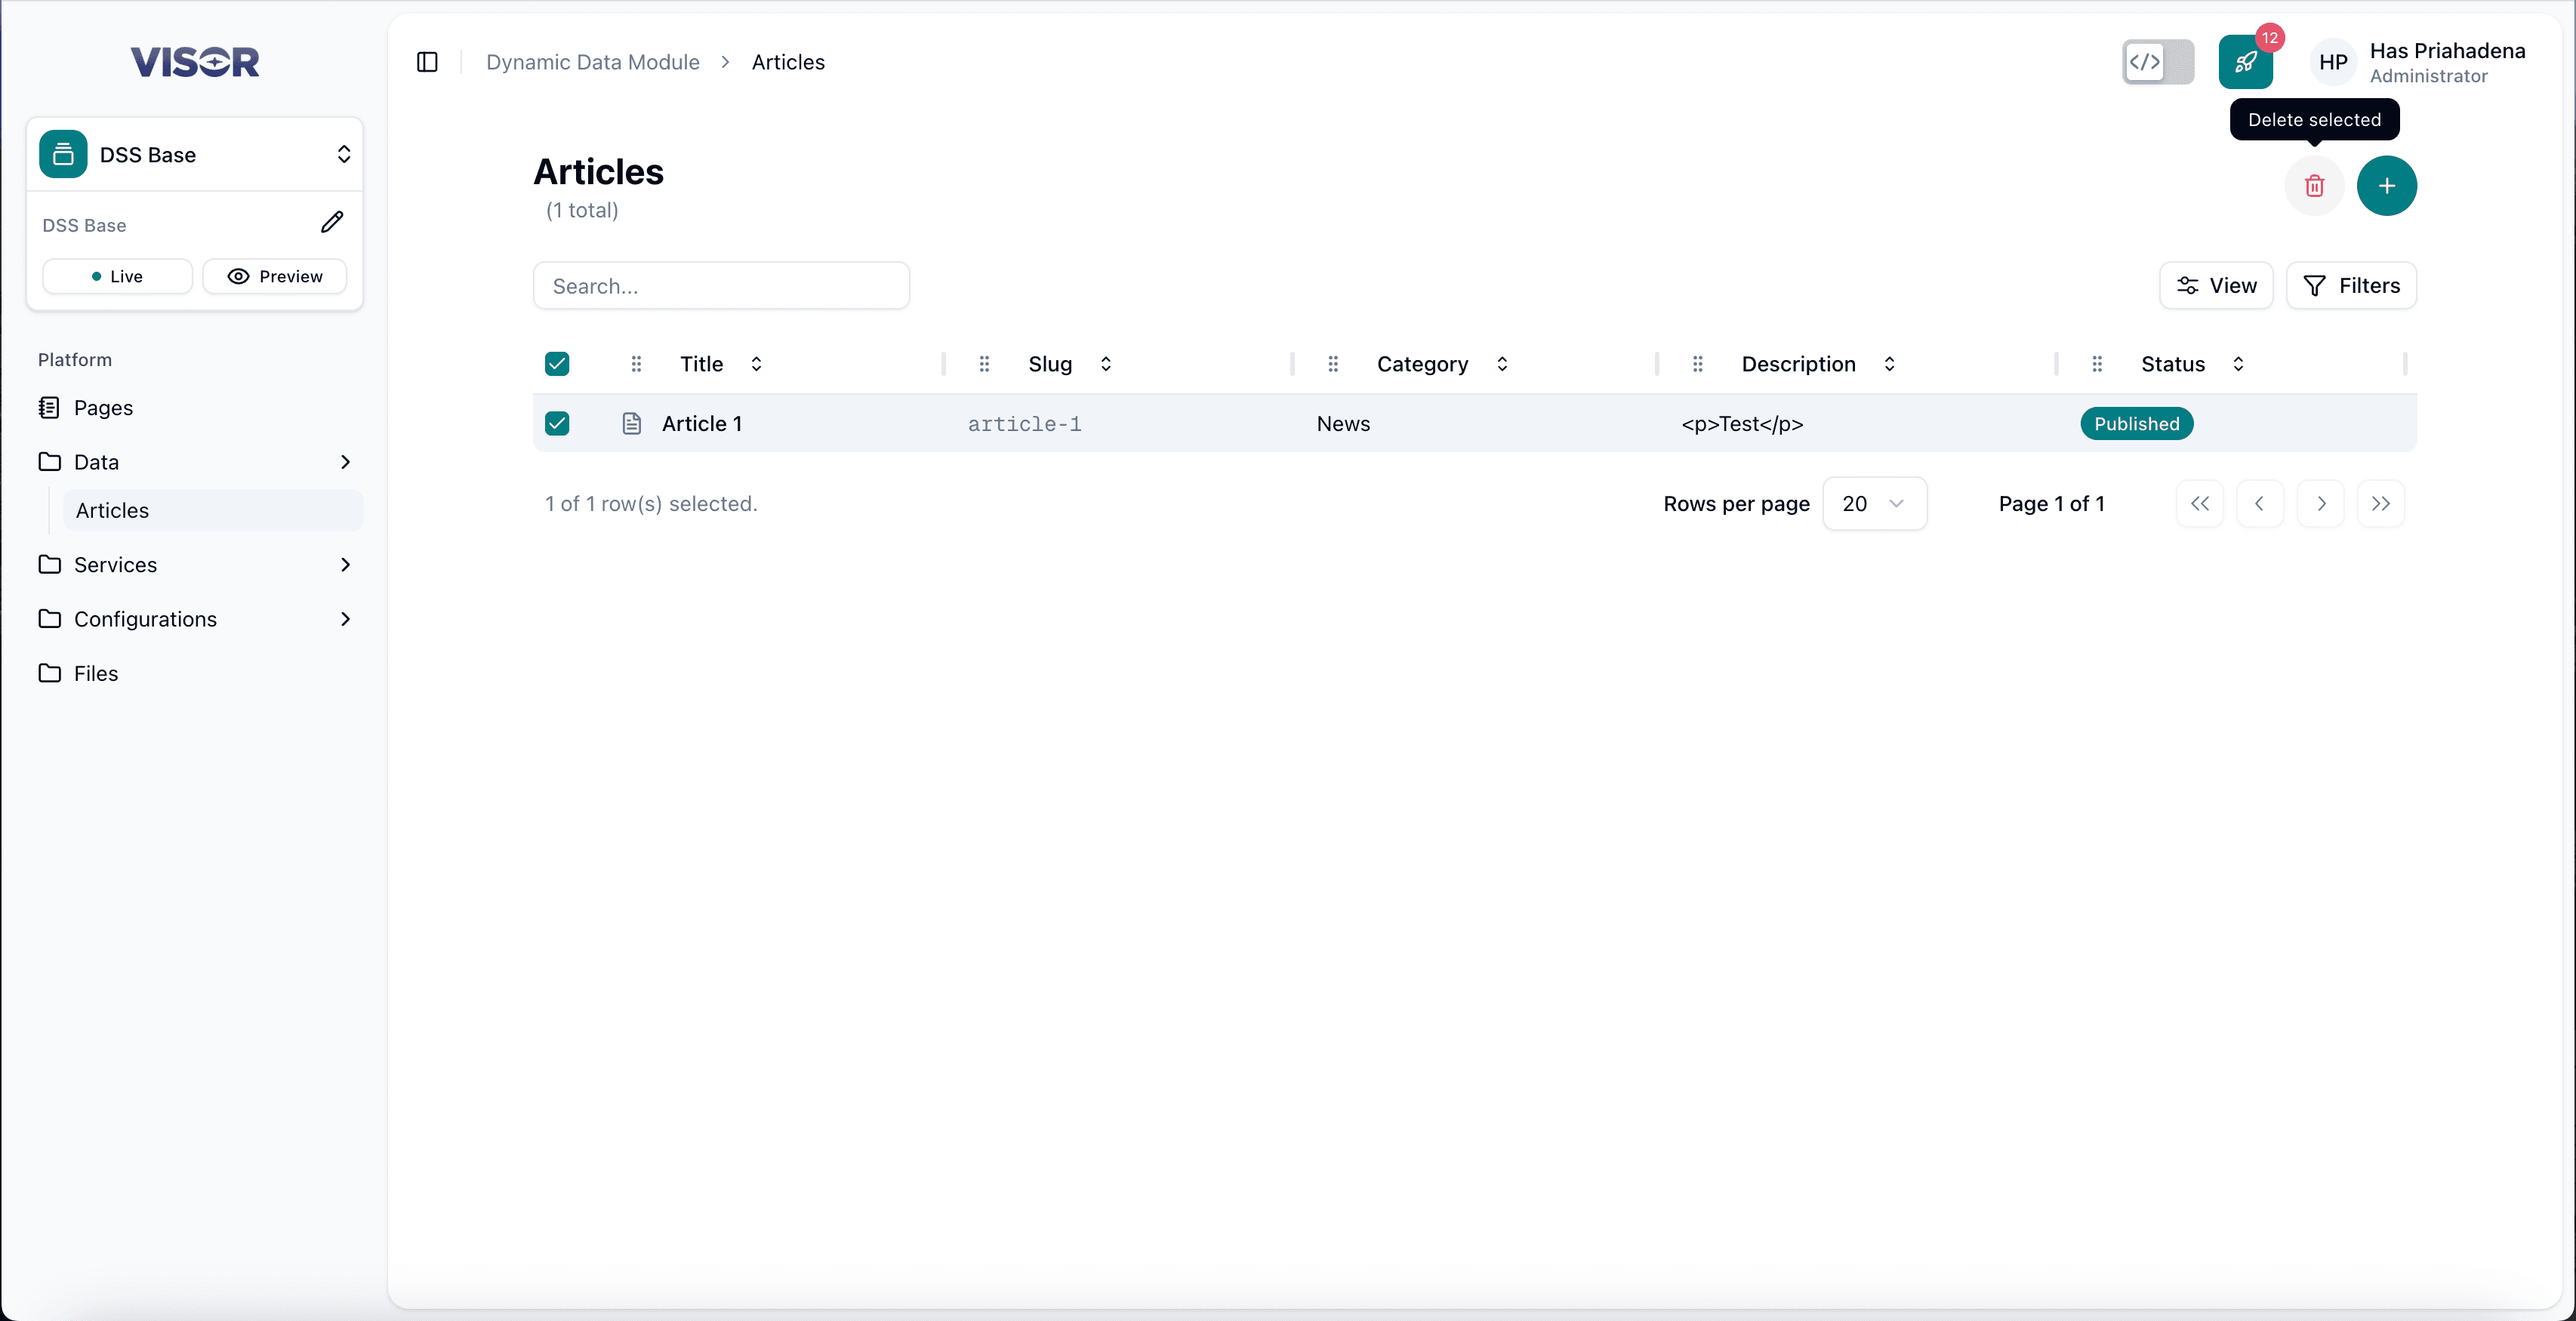
Each row in the table shows:
| Column | Description |
|---|---|
| Title | The article display title. |
| Slug | The URL-friendly identifier. |
| Category | The assigned category. |
| Description | A preview of the article summary. |
| Status | Current publish state — Published or Start (draft). |
The toolbar at the top-right provides:
- + button — Creates a new article entry.
- View / Filters — Controls how the list is displayed and filtered.
Create an Article
Navigate to Articles
In the left sidebar, open Data and click Articles. You will be taken to the Articles listing page.
Click the + button
In the top-right corner of the listing page, click the + button.
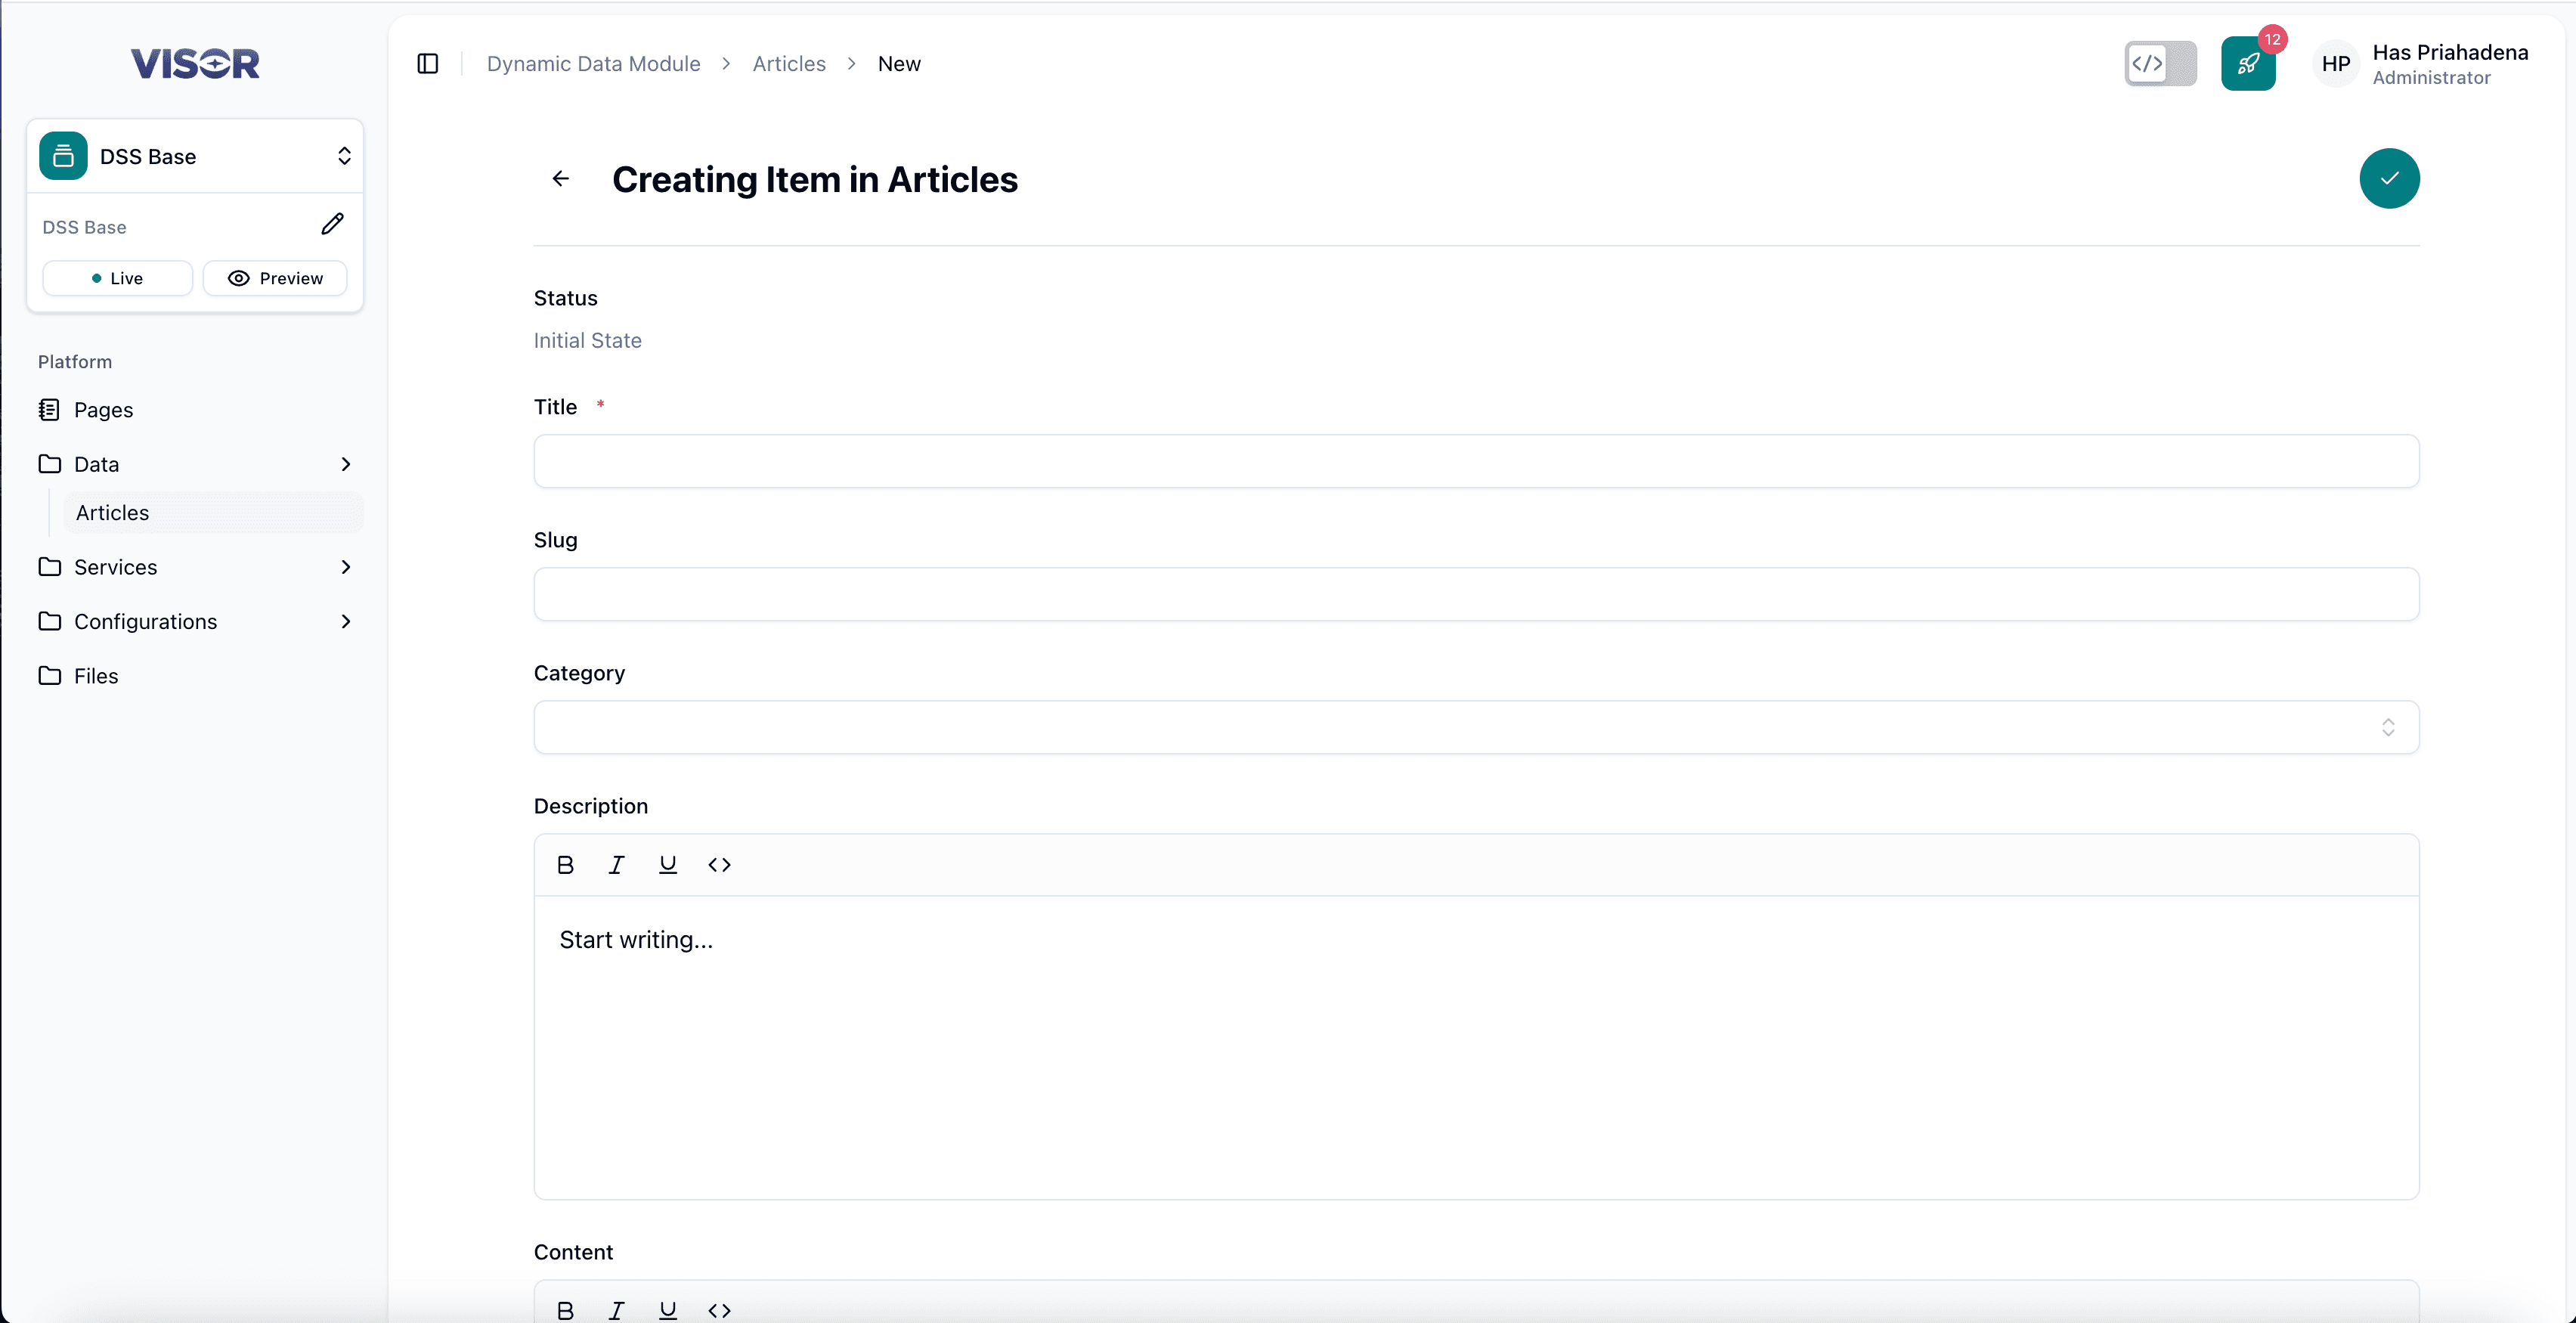
This opens the Creating Item in Articles form.
Fill in the article fields
Complete the form fields as required:
| Field | Required | Notes |
|---|---|---|
| Title | Yes ★ | The display title of the article. This is the only mandatory field. |
| Slug | No | Auto-generated from the title. You can override it manually if needed. |
| Category | No | Select one of: News, Blog, Case Study, or Media Release. |
| Description | No | Short summary with basic rich text formatting available. |
| Content | No | Full article body with basic rich text formatting available. |
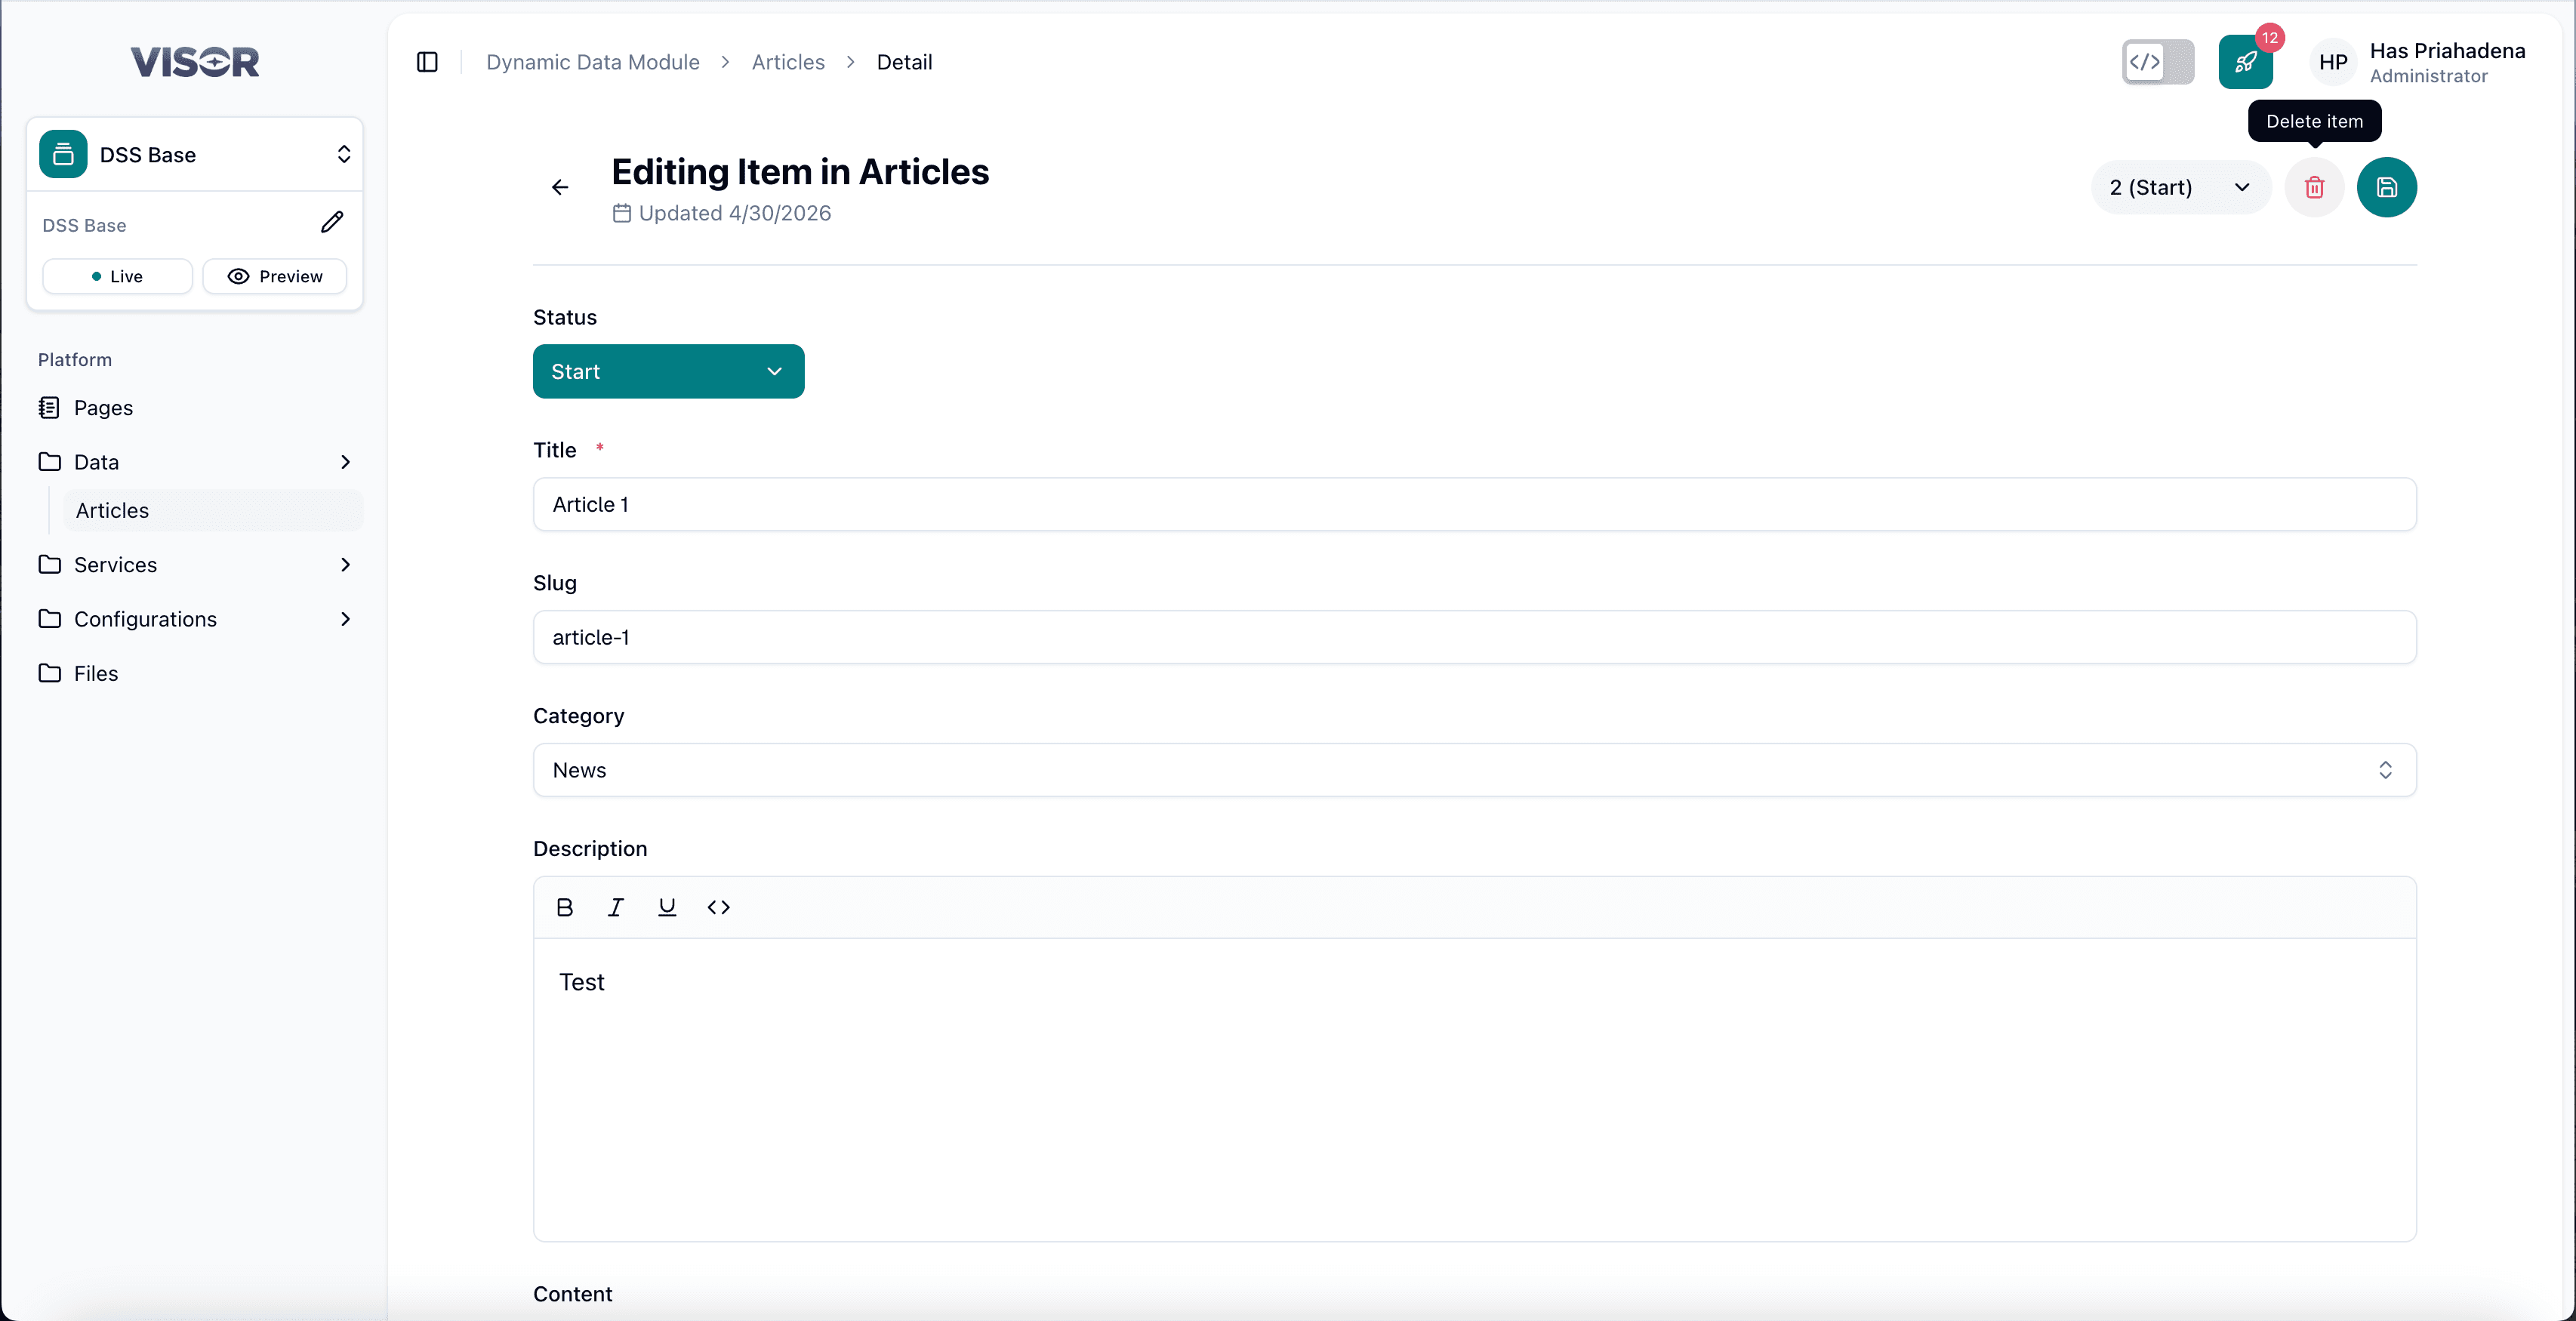
The Status field at the top of the form shows Initial State by default. This means the article is a draft and not yet publicly available. You will publish it separately after saving.
Save the article
Click the ✓ (check) button in the top-right corner of the form to save and create the article entry.
The article is created and you will be taken to the Editing Item in Articles detail view, where you can continue editing or publish the article.
Publishing an Article
After creating an article, it starts in Start status (draft). To make it available to the frontend head, you need to publish it by transitioning its status.
Unlike Page Builder, articles do not have a preview mode. Publishing is done directly from the article’s detail form view.
Open the article
From the Articles listing, click the article title you want to publish. This opens the Editing Item in Articles detail form.
Check the current status
At the top of the form, the Status badge shows the current state (for example, Start). The version indicator in the top-right (e.g. 1 (Start)) also reflects this.
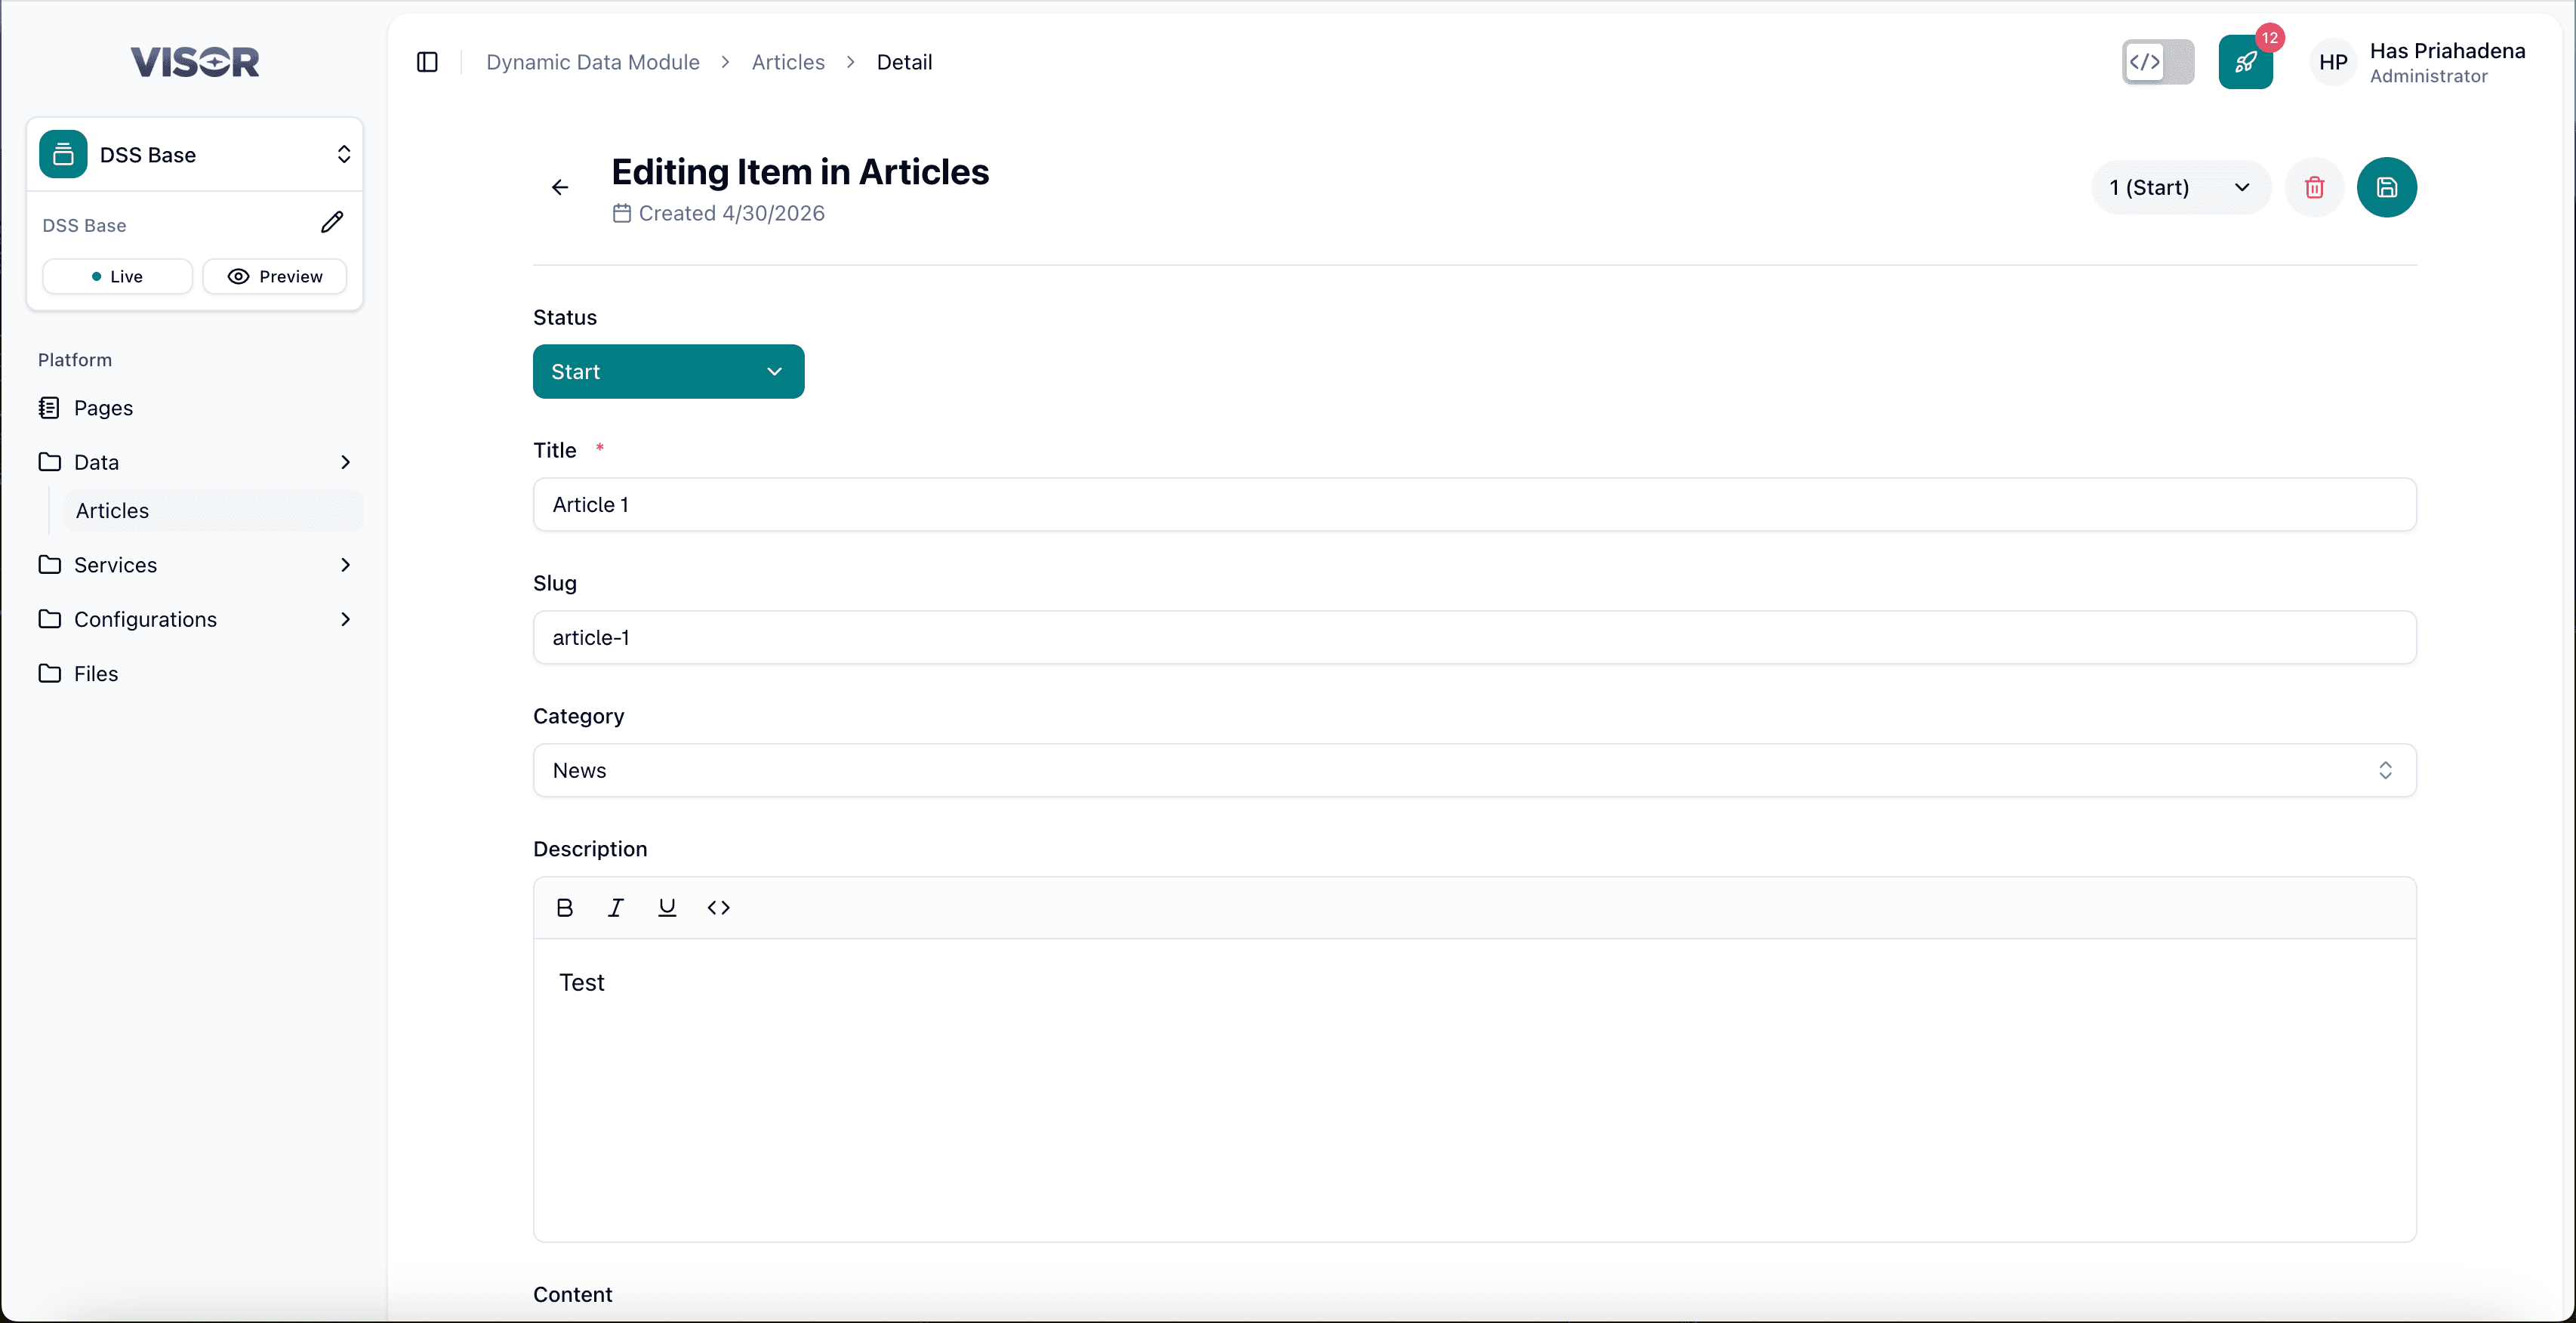
Transition to Published
Click the Status dropdown and select Published.
When the transition completes, the status badge updates to Published and the form fields become read-only — indicating the article is now live and available for the frontend head to consume via the API.
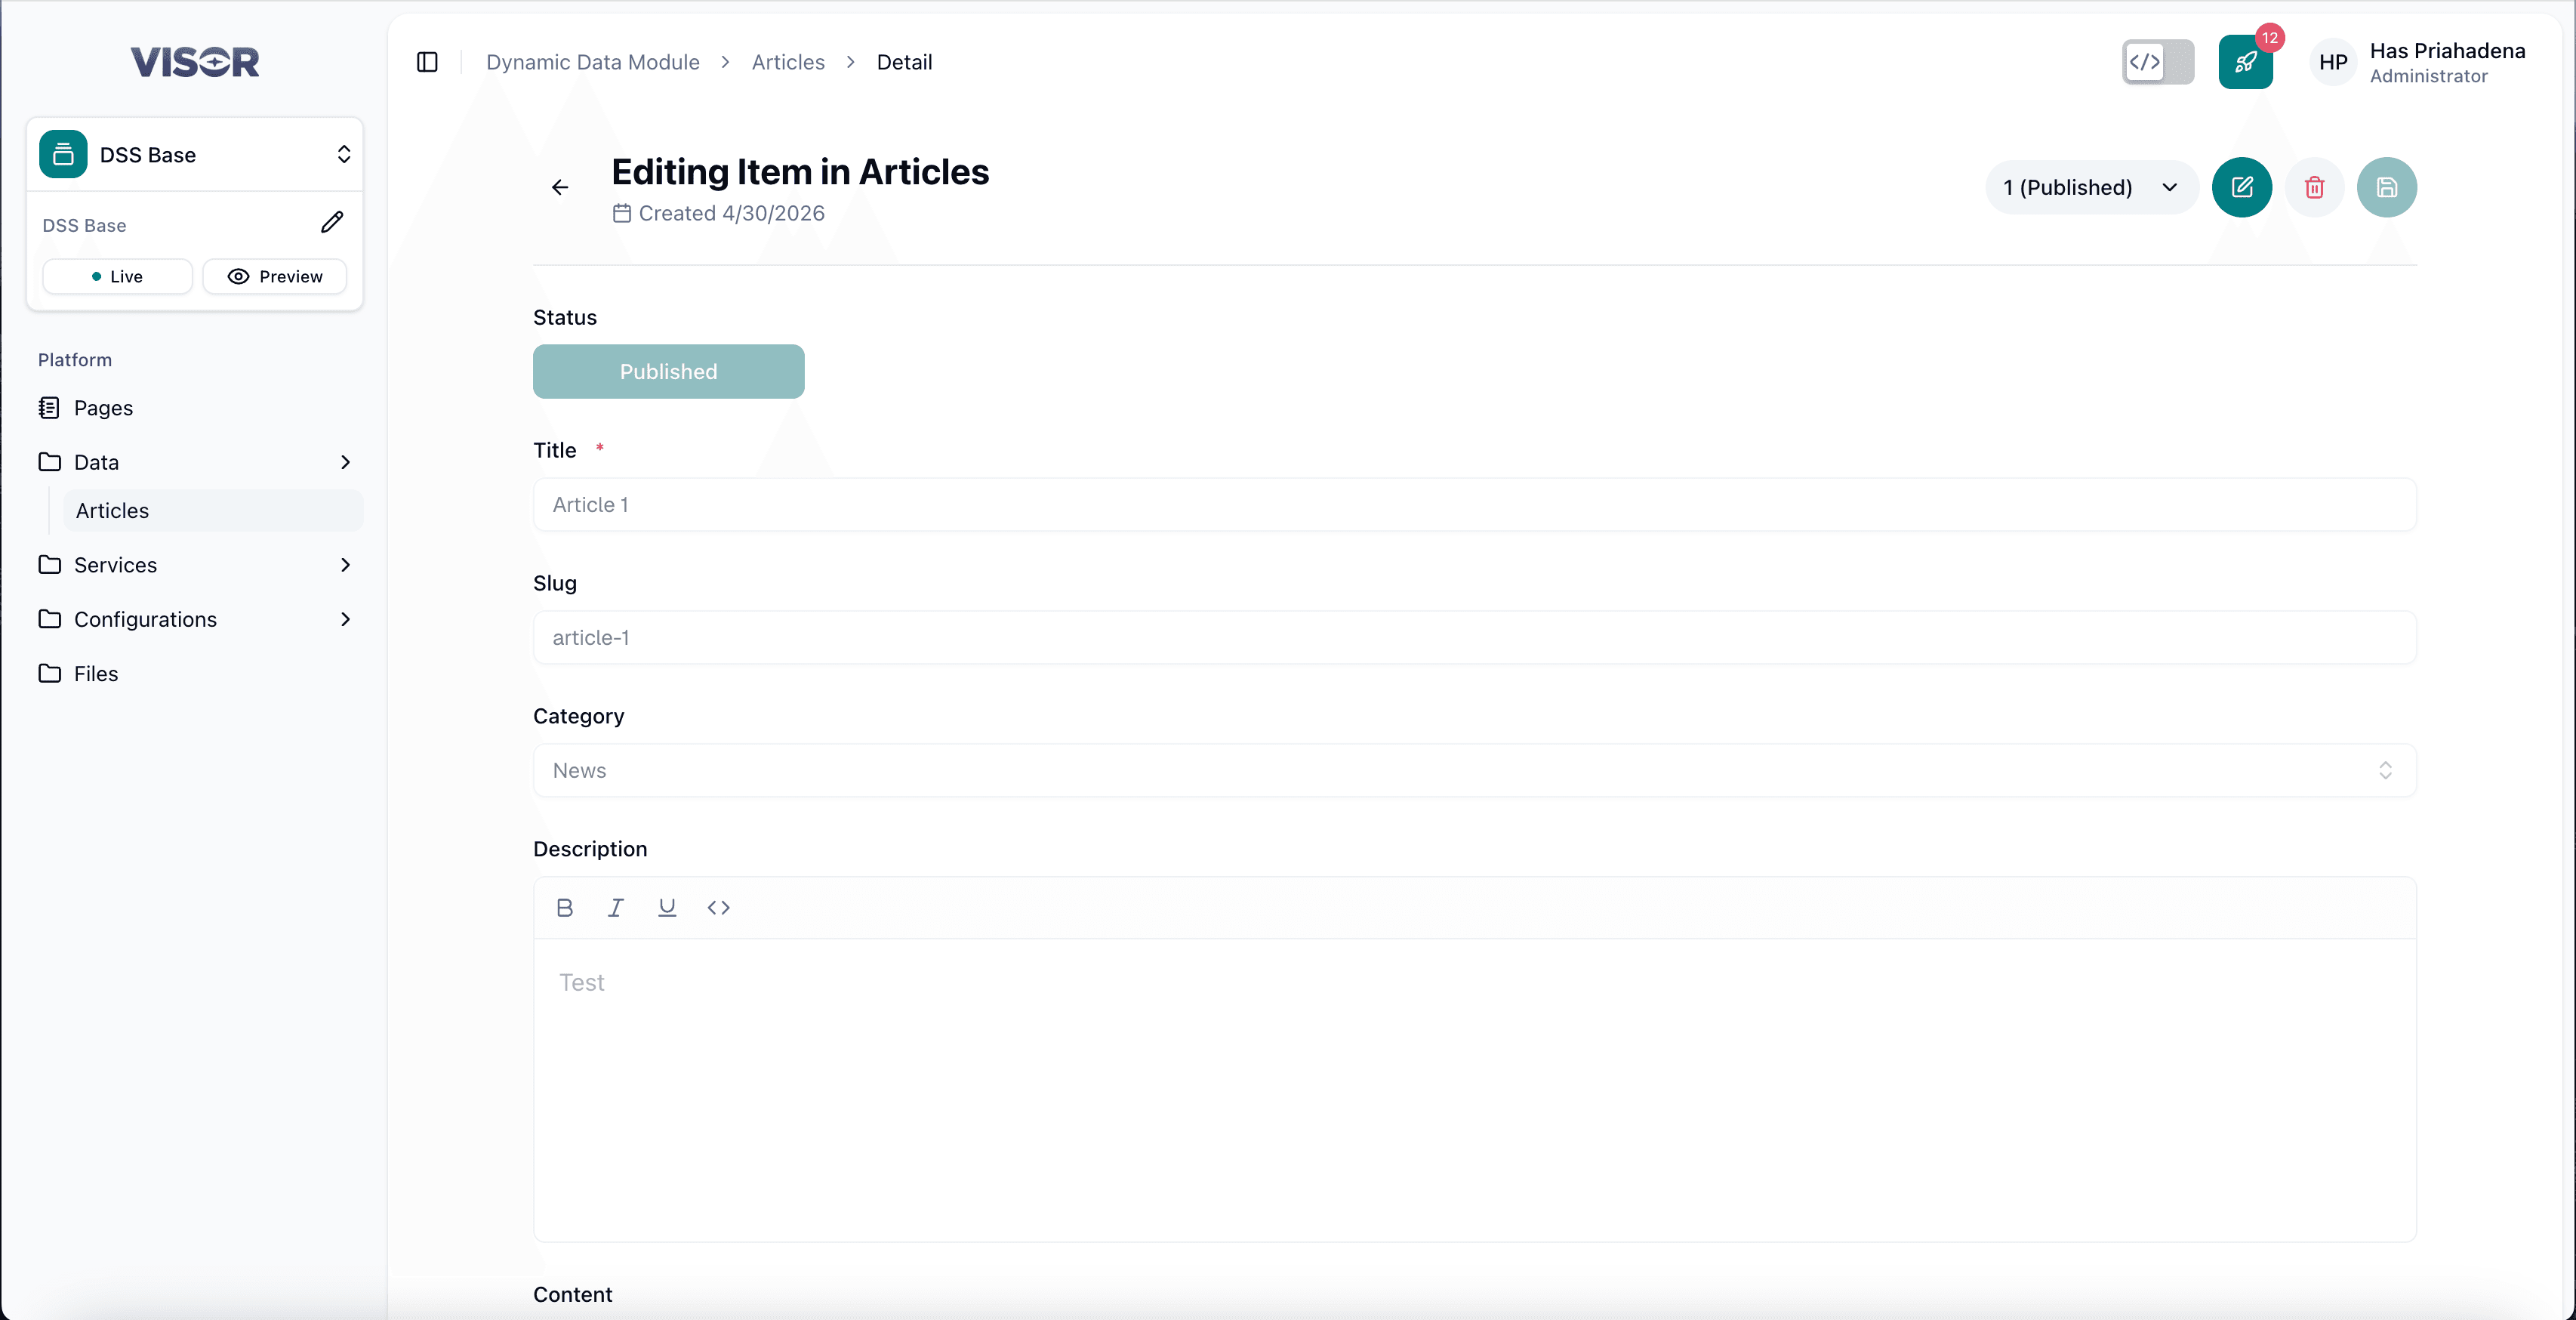
When an article is in Published state, form fields are disabled. To make further edits, use the pencil icon in the top-right to create a new version, then re-publish when ready.
Edit an Article
Open the article from the listing
From the Articles listing, click the article title you want to edit.
This opens the Editing Item in Articles detail form.
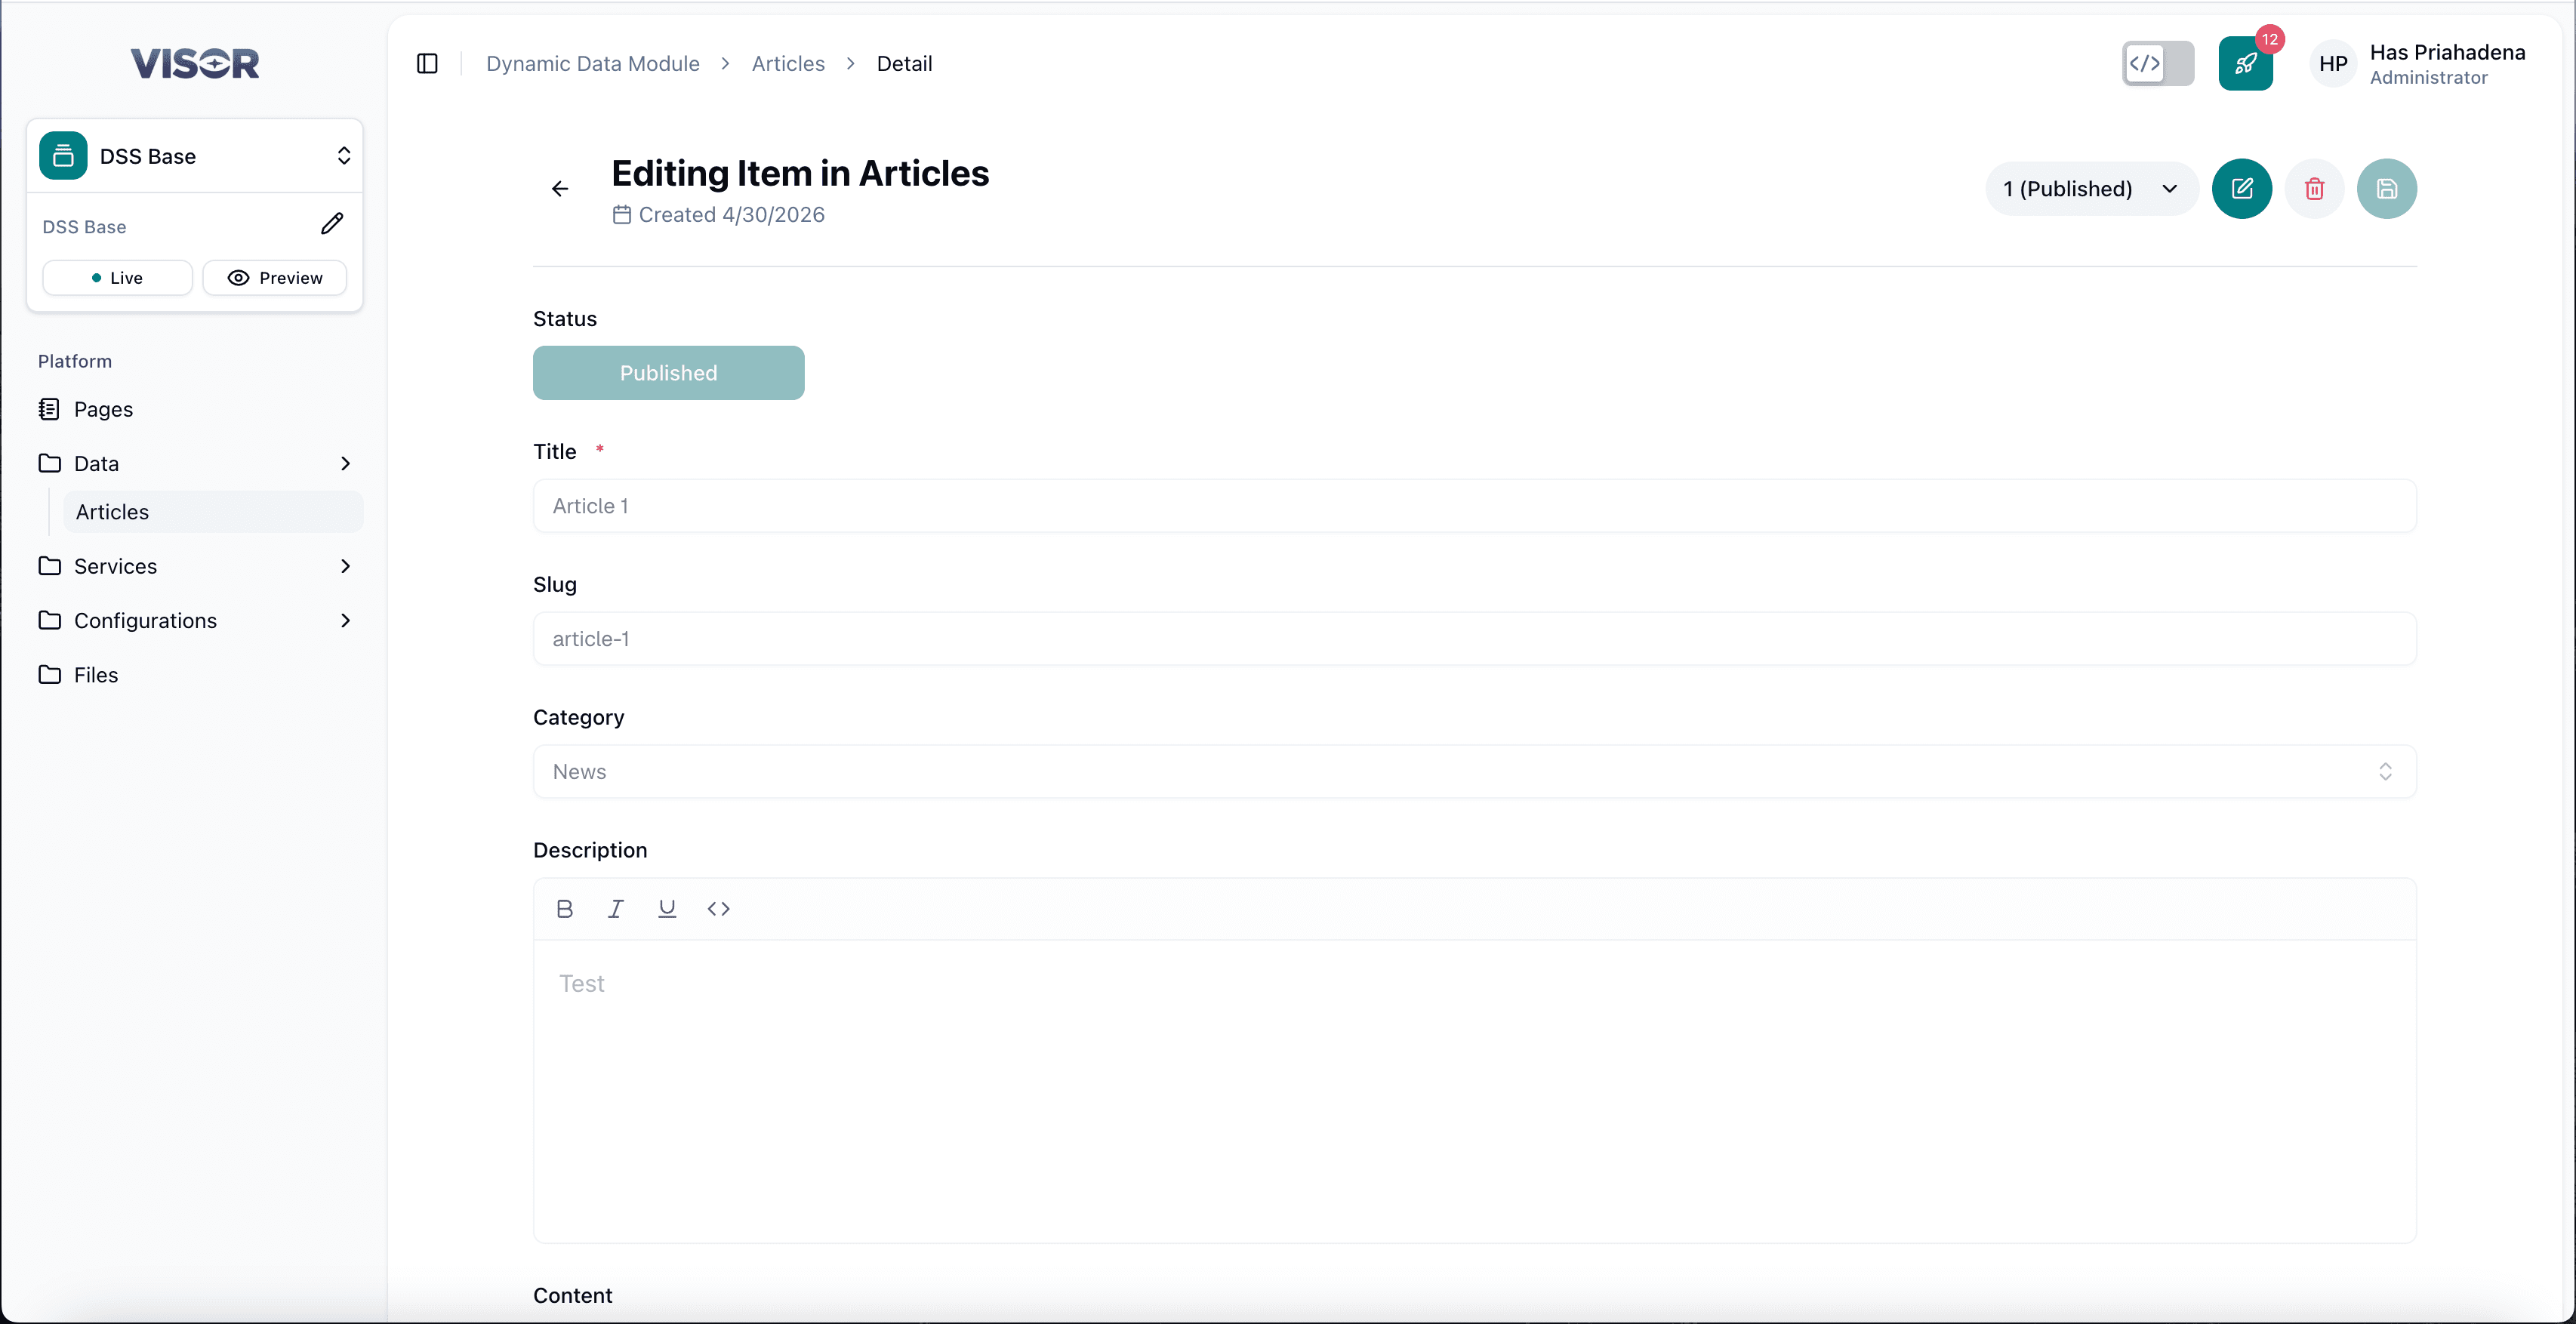
Scenario A: Article status is Published
If the article is Published, form fields are read-only. The version indicator in the top-right shows 1 (Published).
Click the pencil icon in the top-right action bar to create a new draft version. The status transitions to Start and all fields become editable.
Scenario B: Article status is not Published
If the article is in Start status (not yet published, or a newly created draft version), all fields are directly editable. The version indicator in the top-right (e.g. 2 (Start)) reflects the current draft version.
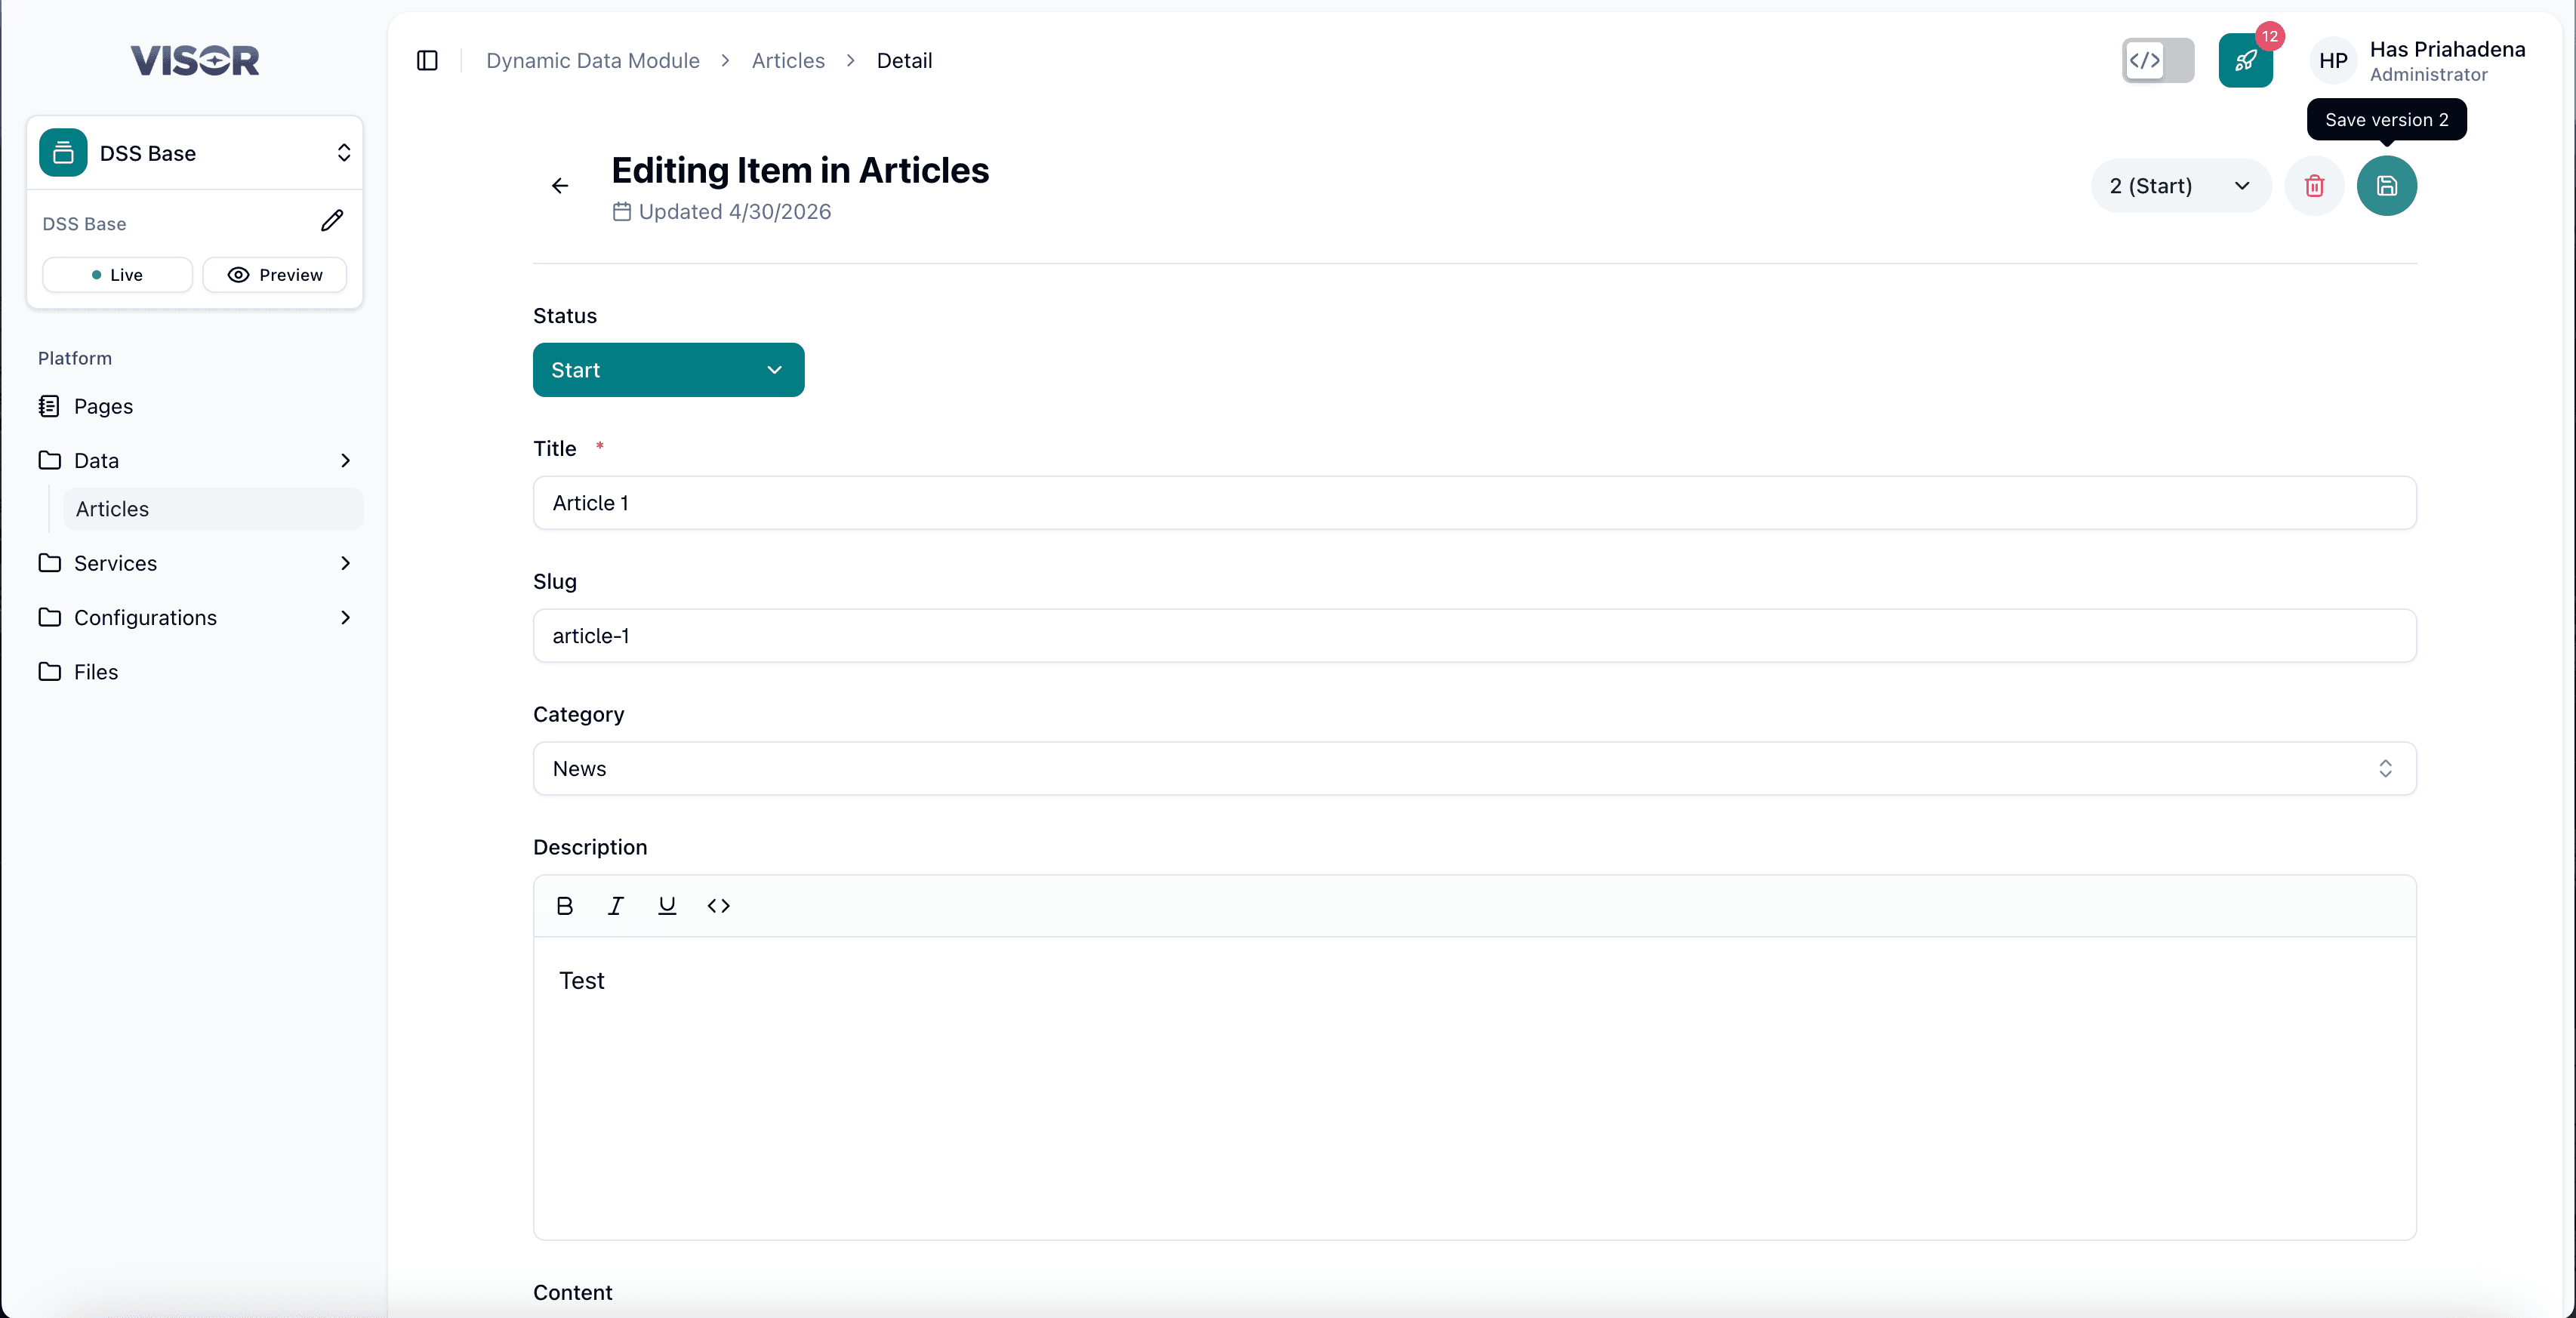
Update the fields and save
Edit the fields as needed, then click the ✓ (check) button in the top-right corner to save the changes.
After saving, re-publish the article using the Status dropdown to transition it to Published.
Delete an Article
There are two ways to delete an article.
Deleting an article is permanent. Make sure you select the correct item before confirming deletion.
Method 1: Delete from the listing page
From the Articles listing, tick the checkbox next to the article you want to delete.
Click the trash icon in the top-right toolbar (Delete selected), then confirm the delete action.
Method 2: Delete from the article form
Open the article from the listing. In the top-right action bar, click the trash icon (Delete item), then confirm the delete action.