Scheduled Publishing
You can have a page or item go live or offline at a set time. The site deploys by itself when the time comes, so nobody needs to click Deploy.
Scheduling needs a workflow with a Scheduled Publish or Scheduled Unpublish state. If you don’t see the option, ask a Site Admin to add one.
Schedule a change
Save your changes
Open the page or item and save it.
Choose the scheduling step
Click the status button and choose the workflow’s scheduling step. Schedule Publish or Schedule Unpublish opens.
Choose the time
Pick the date and time, in your local time, and click Save Schedule or Set Unpublish Date.
The time must leave room for the website to build. Visor tells you if it is too soon: Must be at least N minute(s) from now to allow the build to finish.
Allow a few minutes after the set time for the change to appear. It never goes live early.
While it is scheduled
The item shows a Scheduled Publish or Scheduled Unpublish badge with the time, and it is frozen: you can’t edit it, create a version or switch versions.
- Change the time: click the pencil (Edit schedule).
- Cancel: click the X (Cancel schedule), then confirm. A scheduled publish returns to draft, and a scheduled unpublish stays published.
Close to the set time, you can no longer change or cancel it. A scheduled unpublish keeps the content live until the time arrives.
See what is scheduled
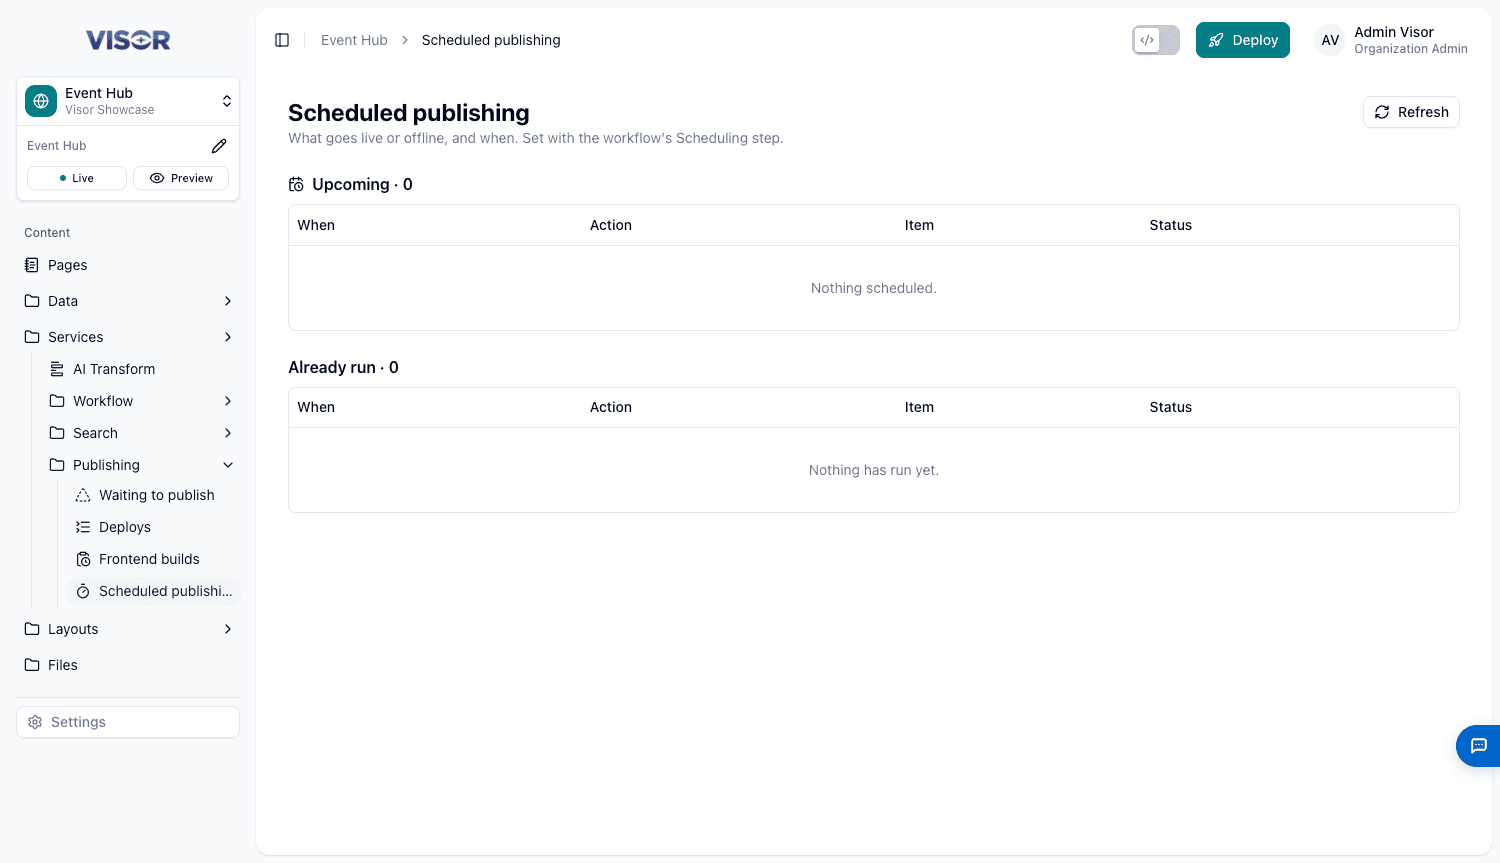
Open Scheduled publishing under Services → Publishing.
| Section | What it shows |
|---|---|
| Upcoming | What goes live or offline next. |
| Already run | What has happened, with any errors. |
Each row shows When, Action (Publish or Unpublish), Item and Status (Scheduled, Done, Failed or Cancelled).
Schedule with an AI tool
A connected AI tool can schedule, move and cancel these for you, after asking your approval. See What Your AI Can Do.