Chocolate Factory Integration
Visor enables Agentic AI integration through Chocolate Factory — allowing you to add intelligent, AI-powered widgets to your website. With this integration, you can deploy smart widgets such as a chat widget that provides conversational AI capabilities directly on your published site.
Chocolate Factory acts as the bridge between your Visor-managed content and AI-driven experiences, giving your end users a modern, interactive way to engage with your site.
Learn More About Chocolate Factory
For a detailed understanding of Chocolate Factory’s full capabilities, architecture, and advanced configuration, refer to the official Chocolate Factory documentation:
🔗 Chocolate Factory Documentation
Checking Your Integration Status
Before using Chocolate Factory features, you need to verify that your site and frontend have the integration enabled.
If your site was onboarded with Chocolate Factory integration enabled, the configuration will already be available in your frontend detail page.
How to Check
Go to Settings
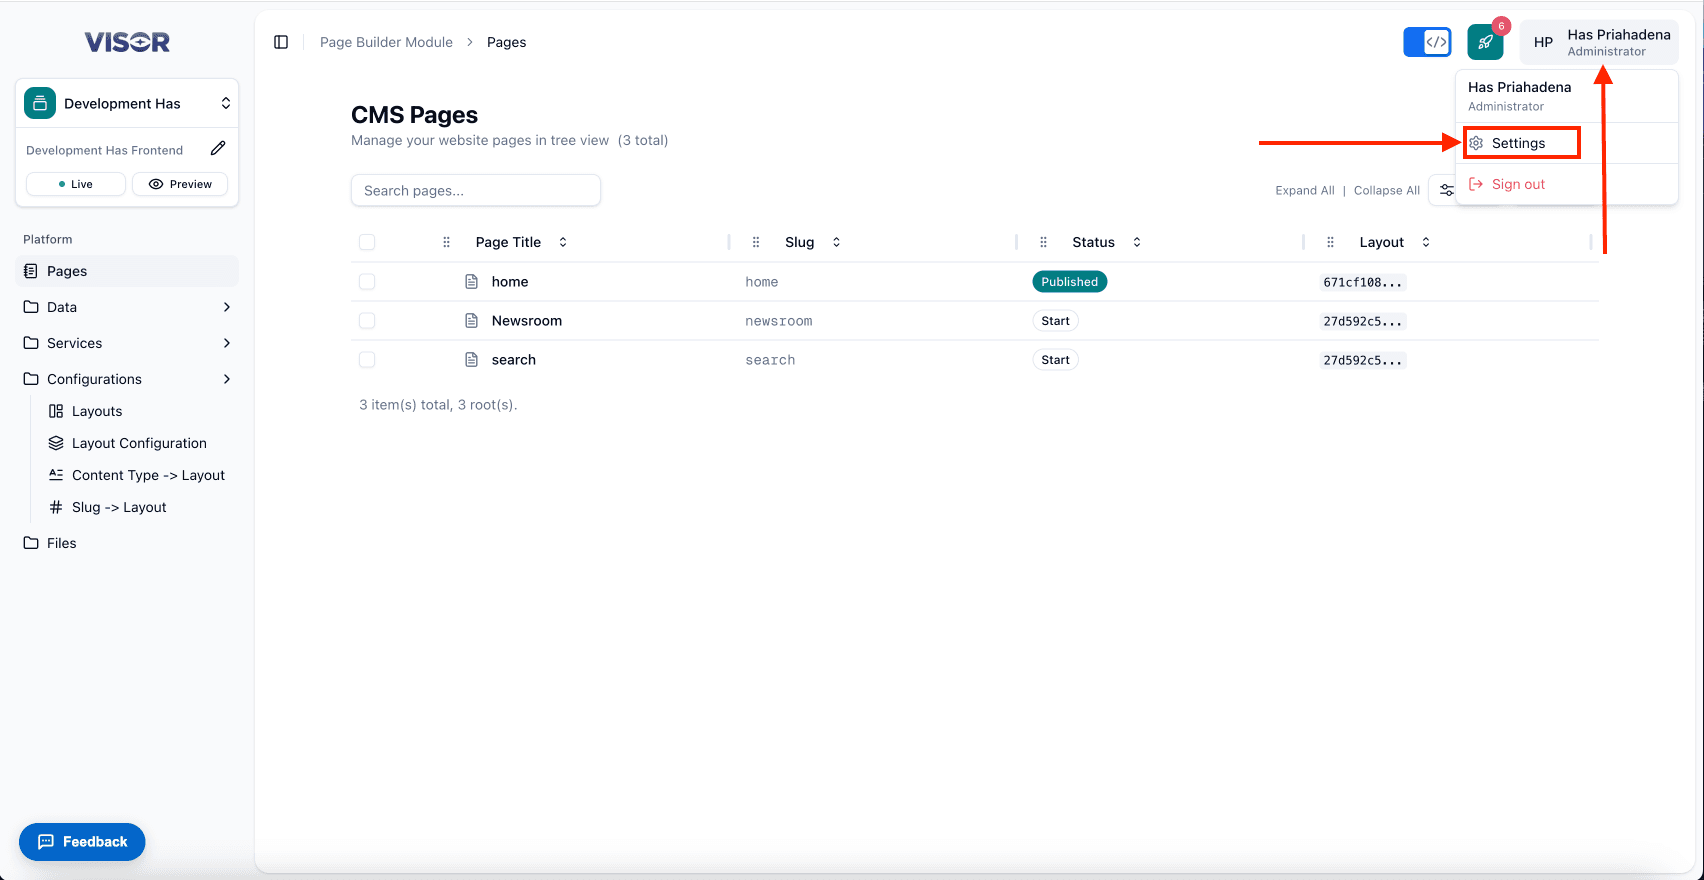
Click on your profile icon at the top-right corner of Visor Studio. A dropdown menu will appear — click Settings.
Open Frontend
On the left side menu, click Frontend, then click on the frontend item that suits your project.
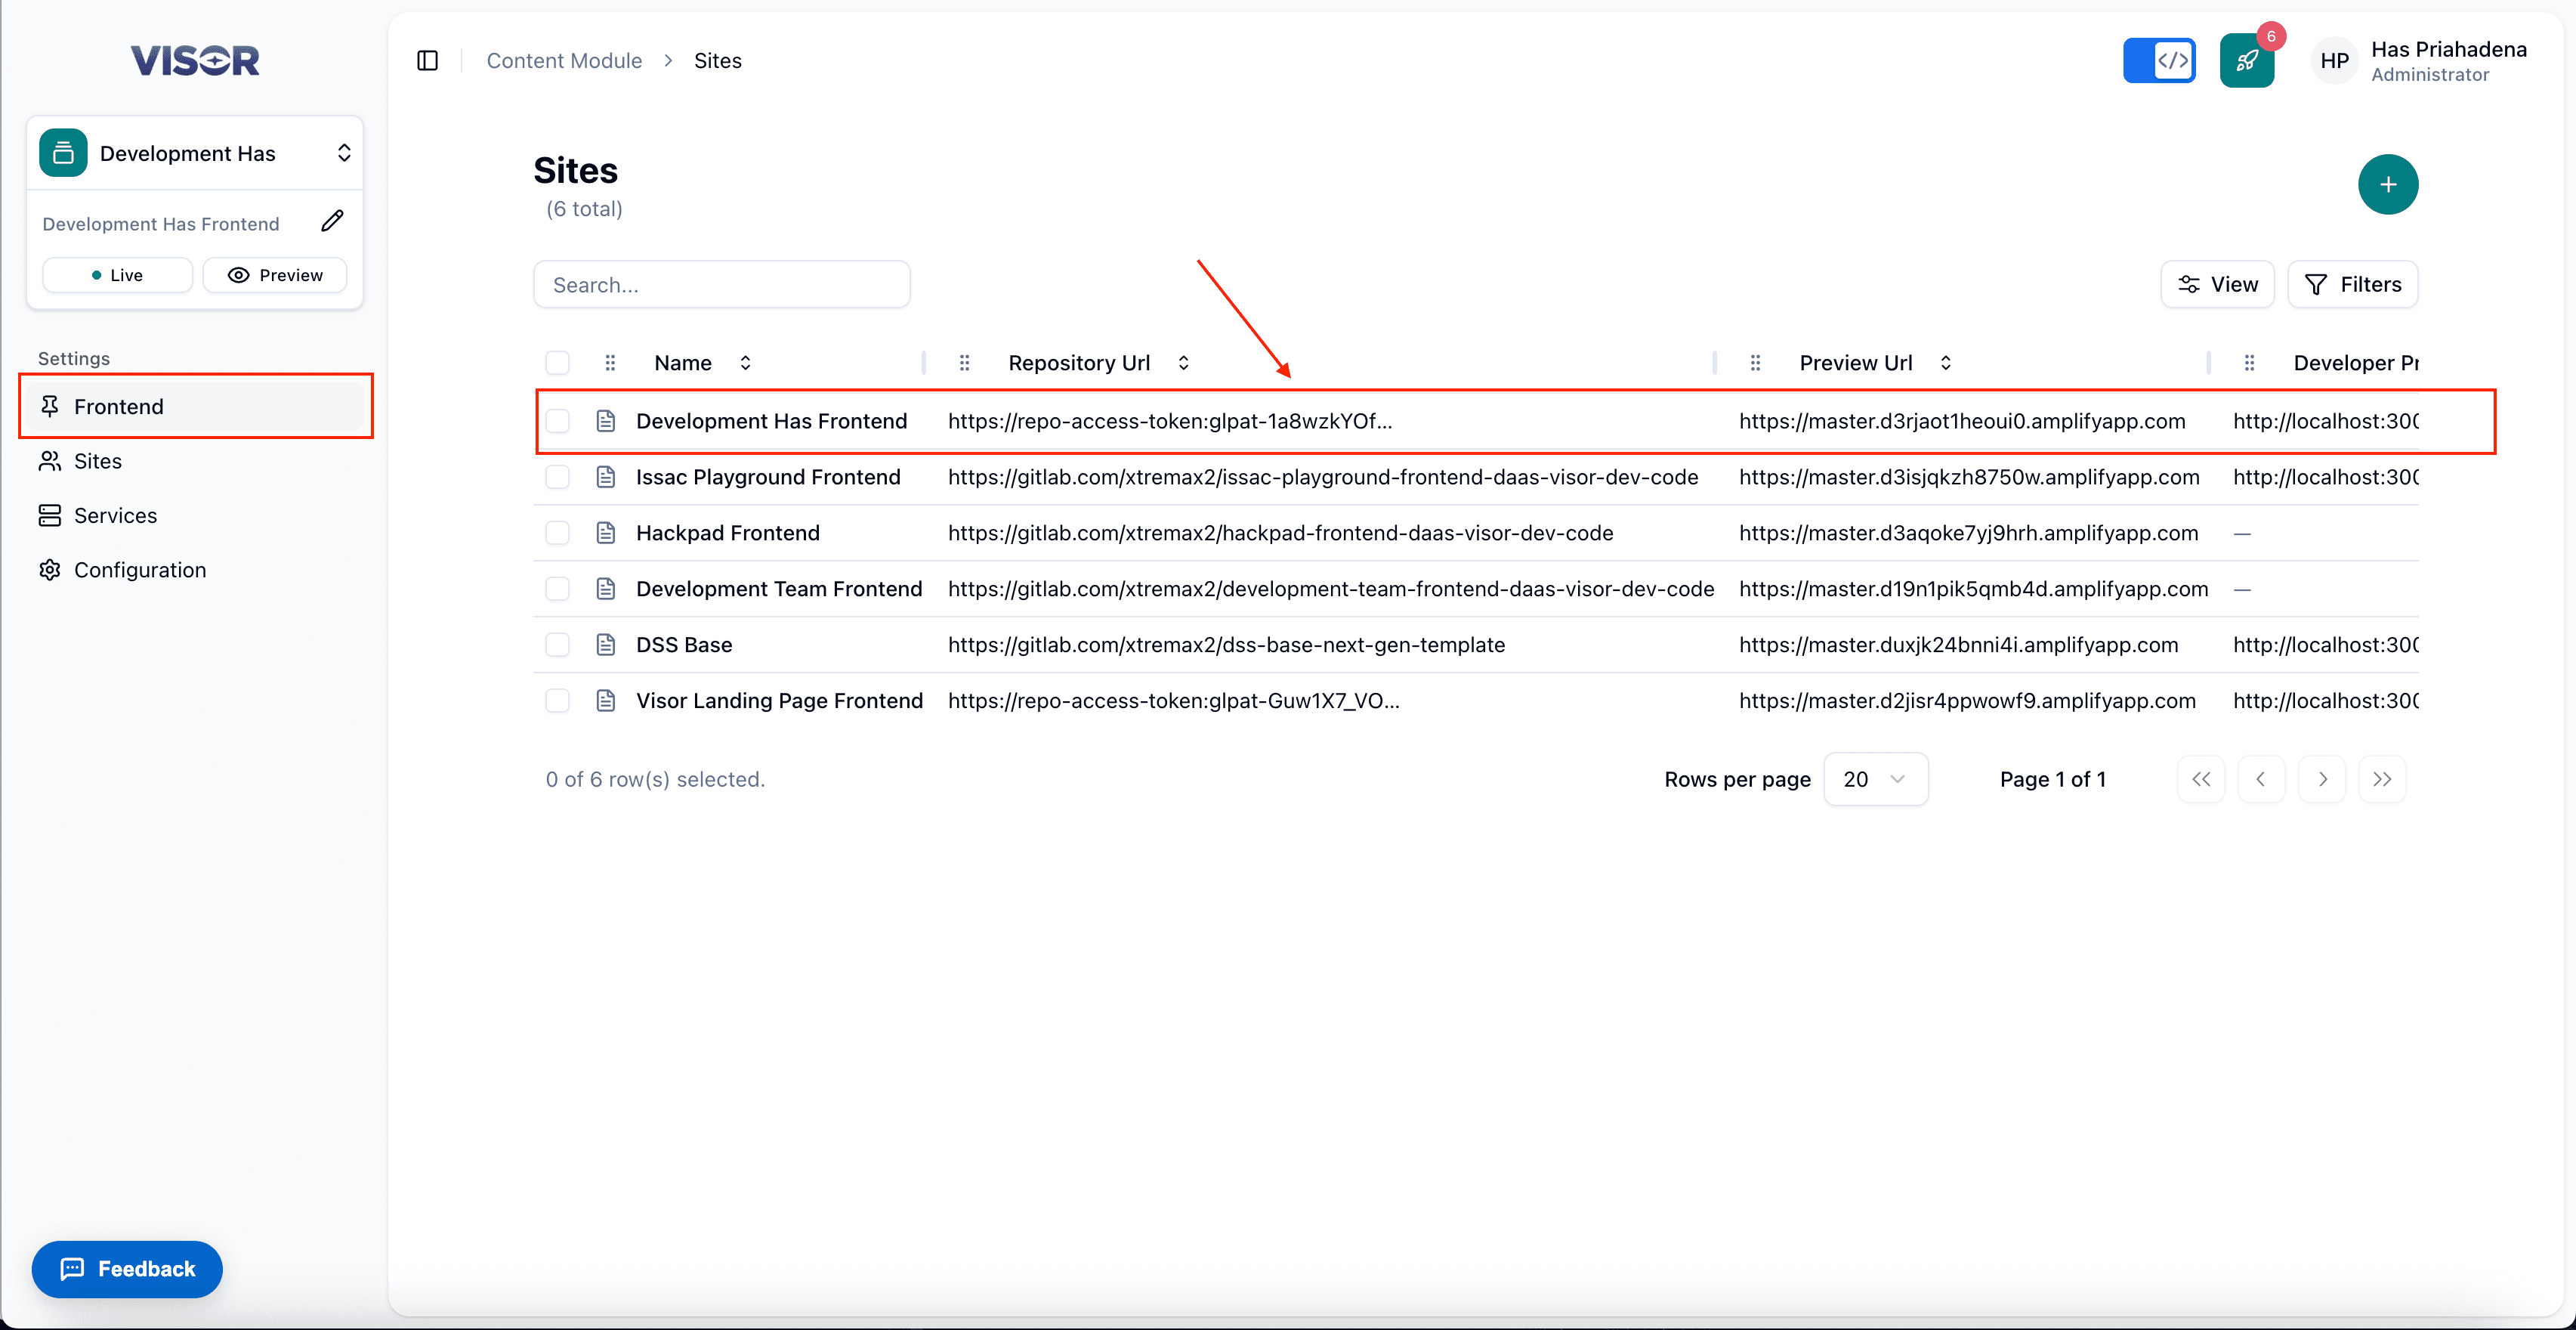
Usually only one frontend item is shown unless you have multiple frontends configured for your tenant.
Check Chocolate Factory Configuration
You will be redirected to the frontend detail page. Open the Site Configuration section and scroll down — you will see the Chocolate Factory Project Configuration.
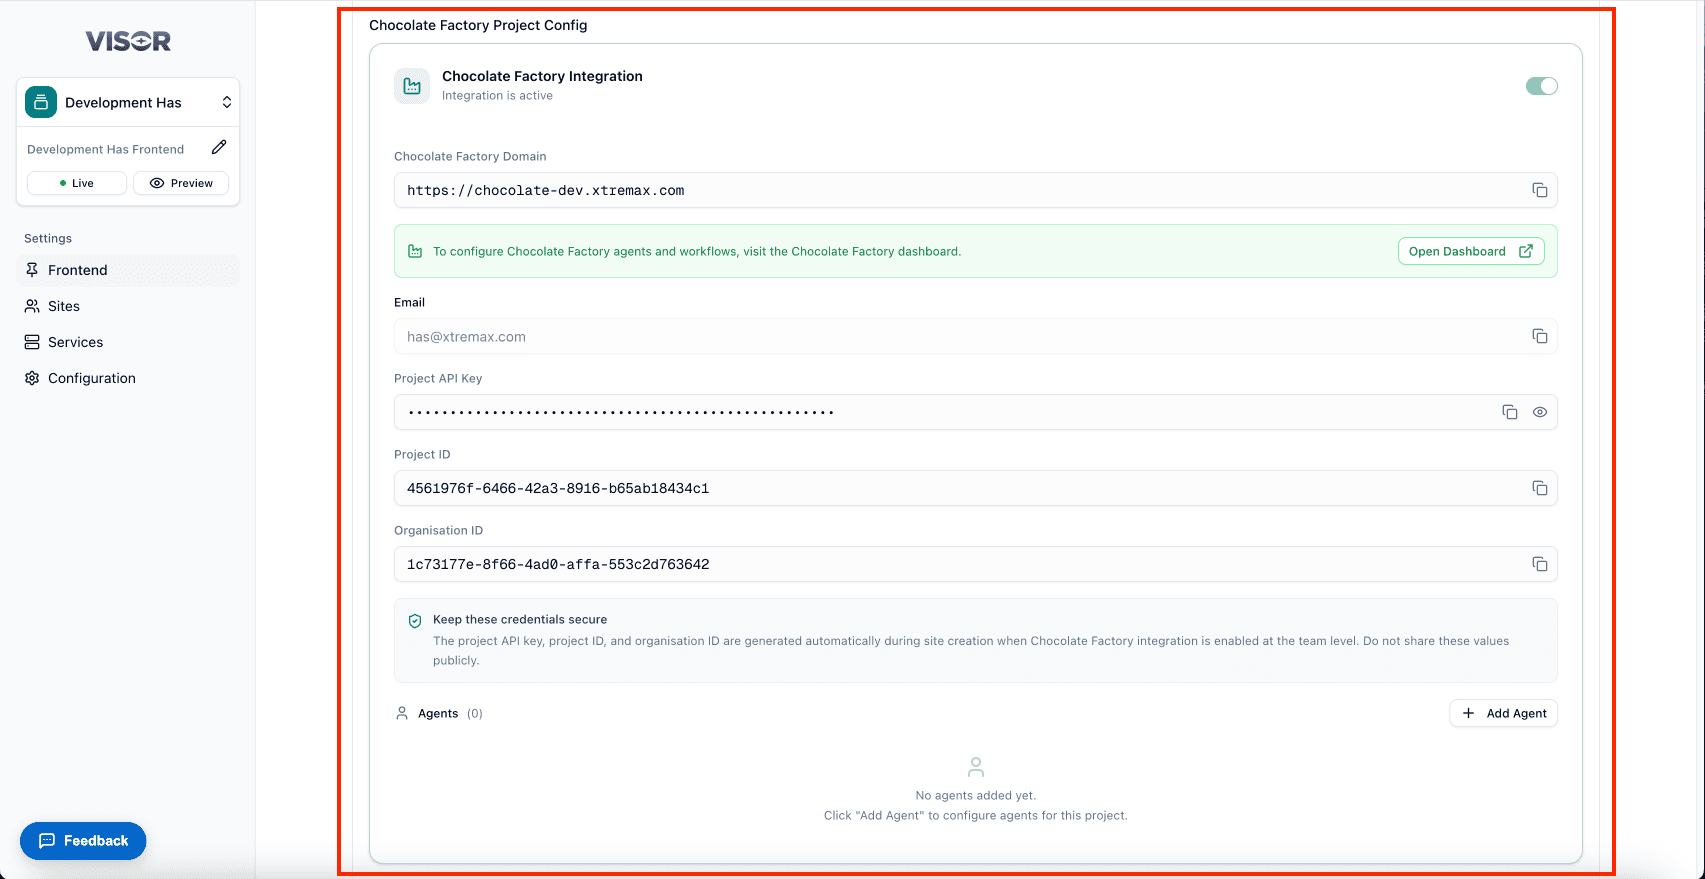
If the Chocolate Factory configuration is present, your integration is active and ready to use.
If Chocolate Factory Is Not Enabled
If you do not see the Chocolate Factory configuration in your frontend detail page:
- For regular users — Contact your administrator and request them to enable Chocolate Factory integration for your site.
- For administrators — You can enable the integration yourself. Please reach out to the platform team to have Chocolate Factory enabled for your tenant.
Configuring the AI Agent in Chocolate Factory
Once your integration is enabled, follow these steps to set up the AI Agent that powers smart widgets on your site.
Access the Chocolate Factory Platform
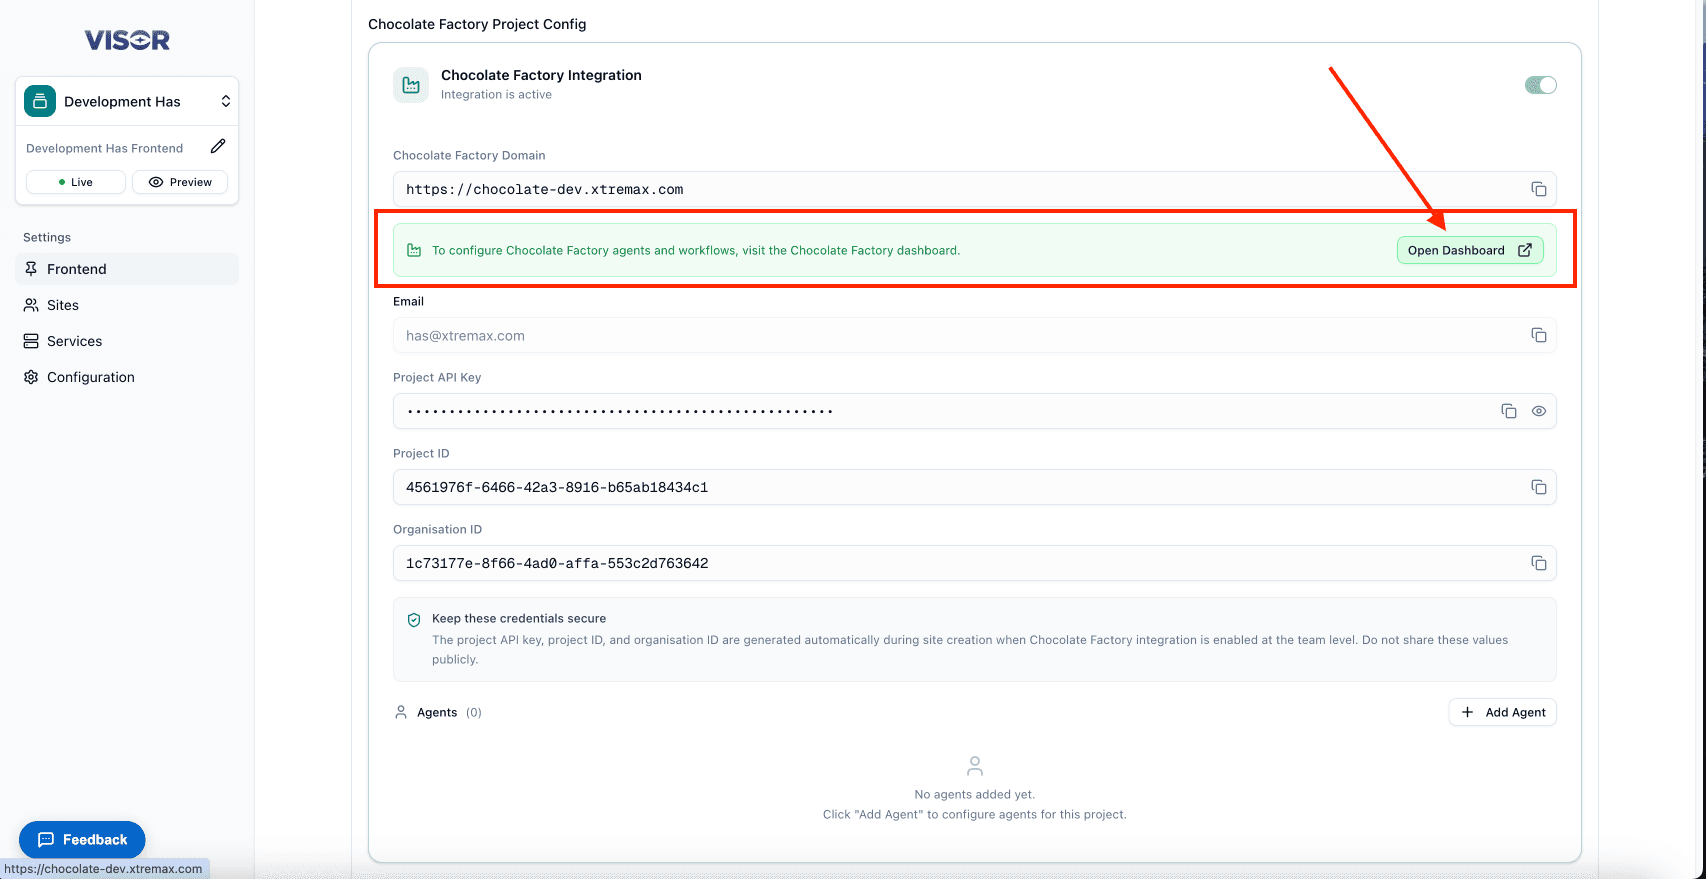
In the frontend detail page (as described in the steps above), click the Chocolate Factory link. This will redirect you to the Chocolate Factory dashboard.
Log in with your username and password. If you forgot your password, you can sign in using the magic link option and update your password later.

For more details on signing in, see: Sign in to your account .
Navigate to Database & Tools
Once logged in, select the project you are assigned to. Then on the sidebar, go to Database & Tools.
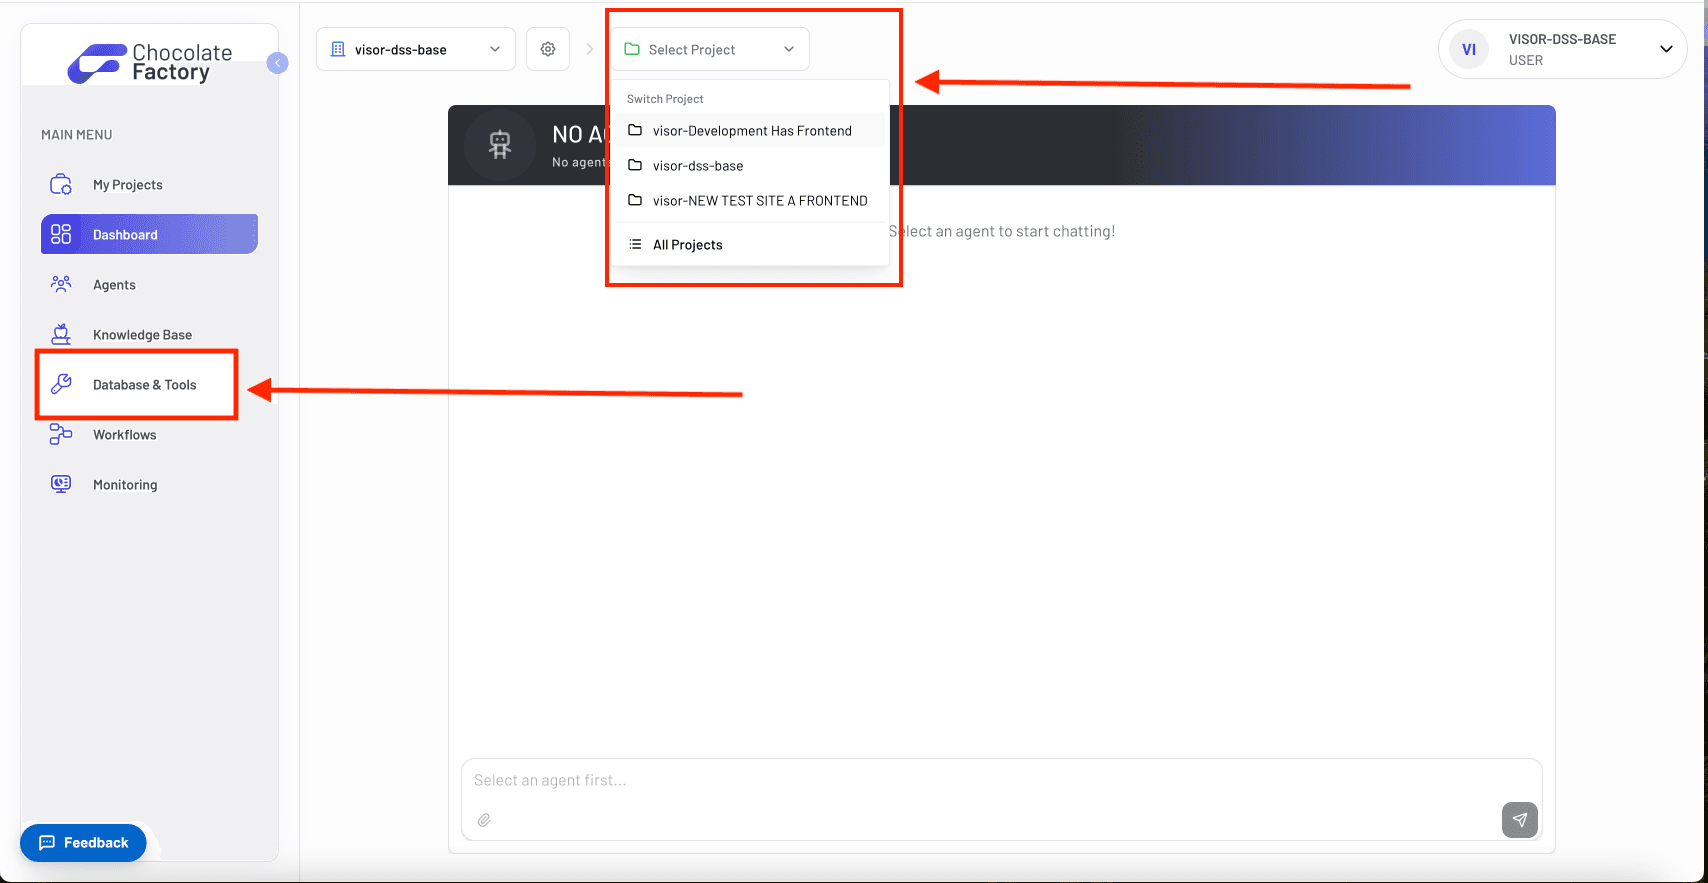
Add an MCP Server
In the Tools section, if you don’t have an MCP server yet, click the Add MCP Server or Create button to add one.
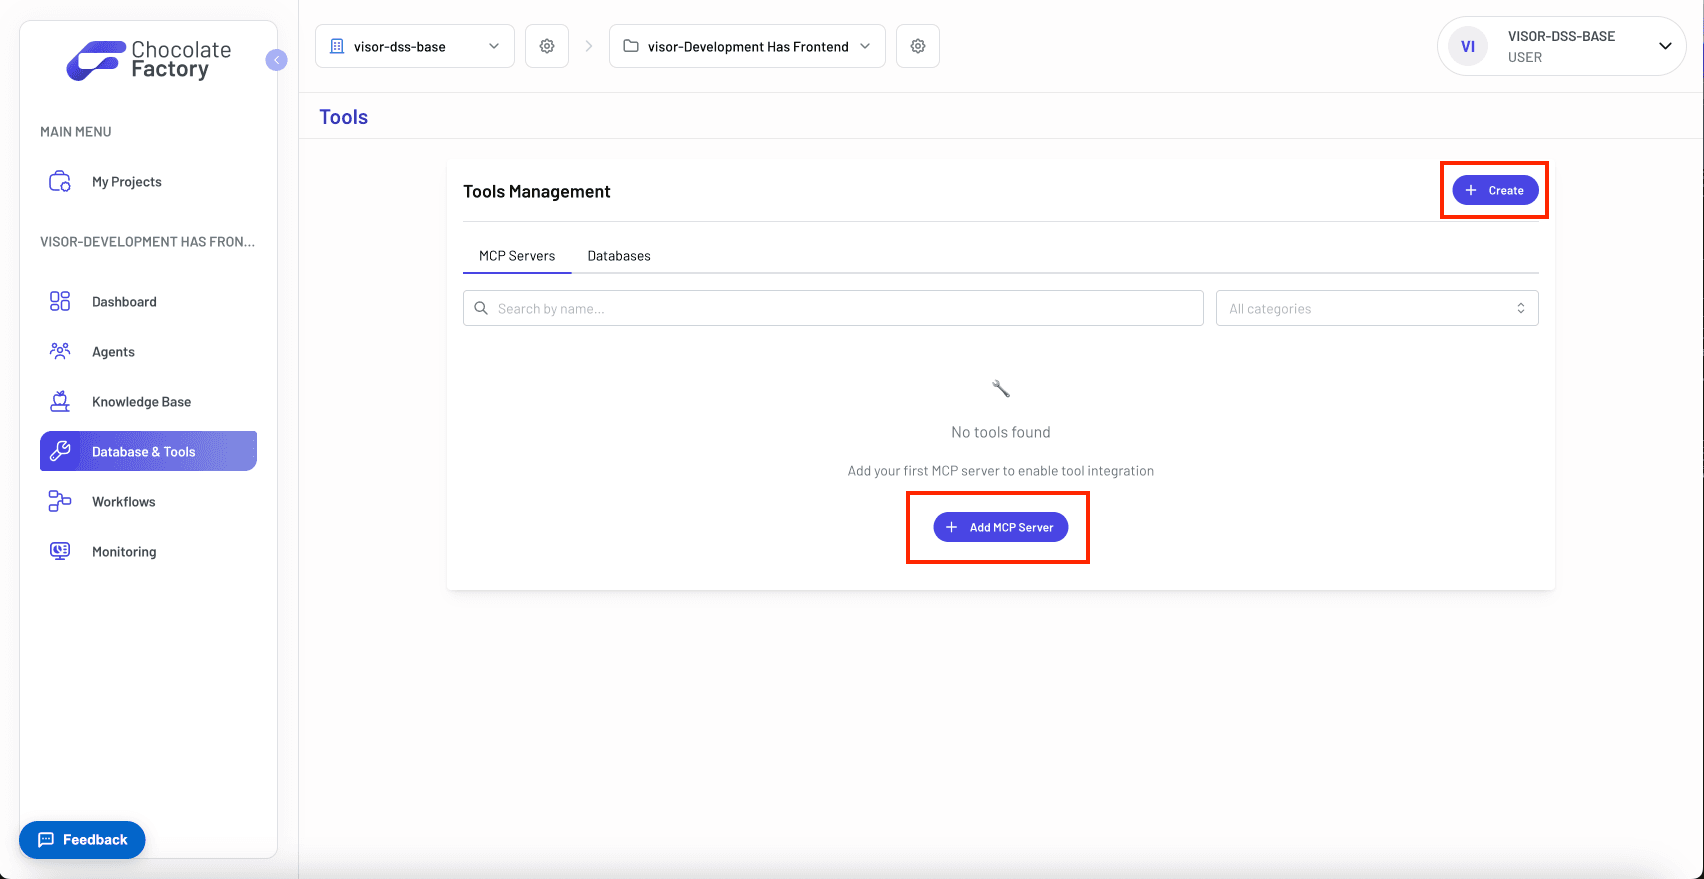
Configure the MCP Server
Fill in the form. The most important fields are:
Server URL
Set the server URL to your DaaS domain followed by /api/mcp:
https://<your-daas-domain>/api/mcpTo find your DaaS domain, check the downloaded starter kit — it’s available in the .env or .env.example file as an environment variable.
Authentication
Set the authentication type to API Key and fill in the API key value.
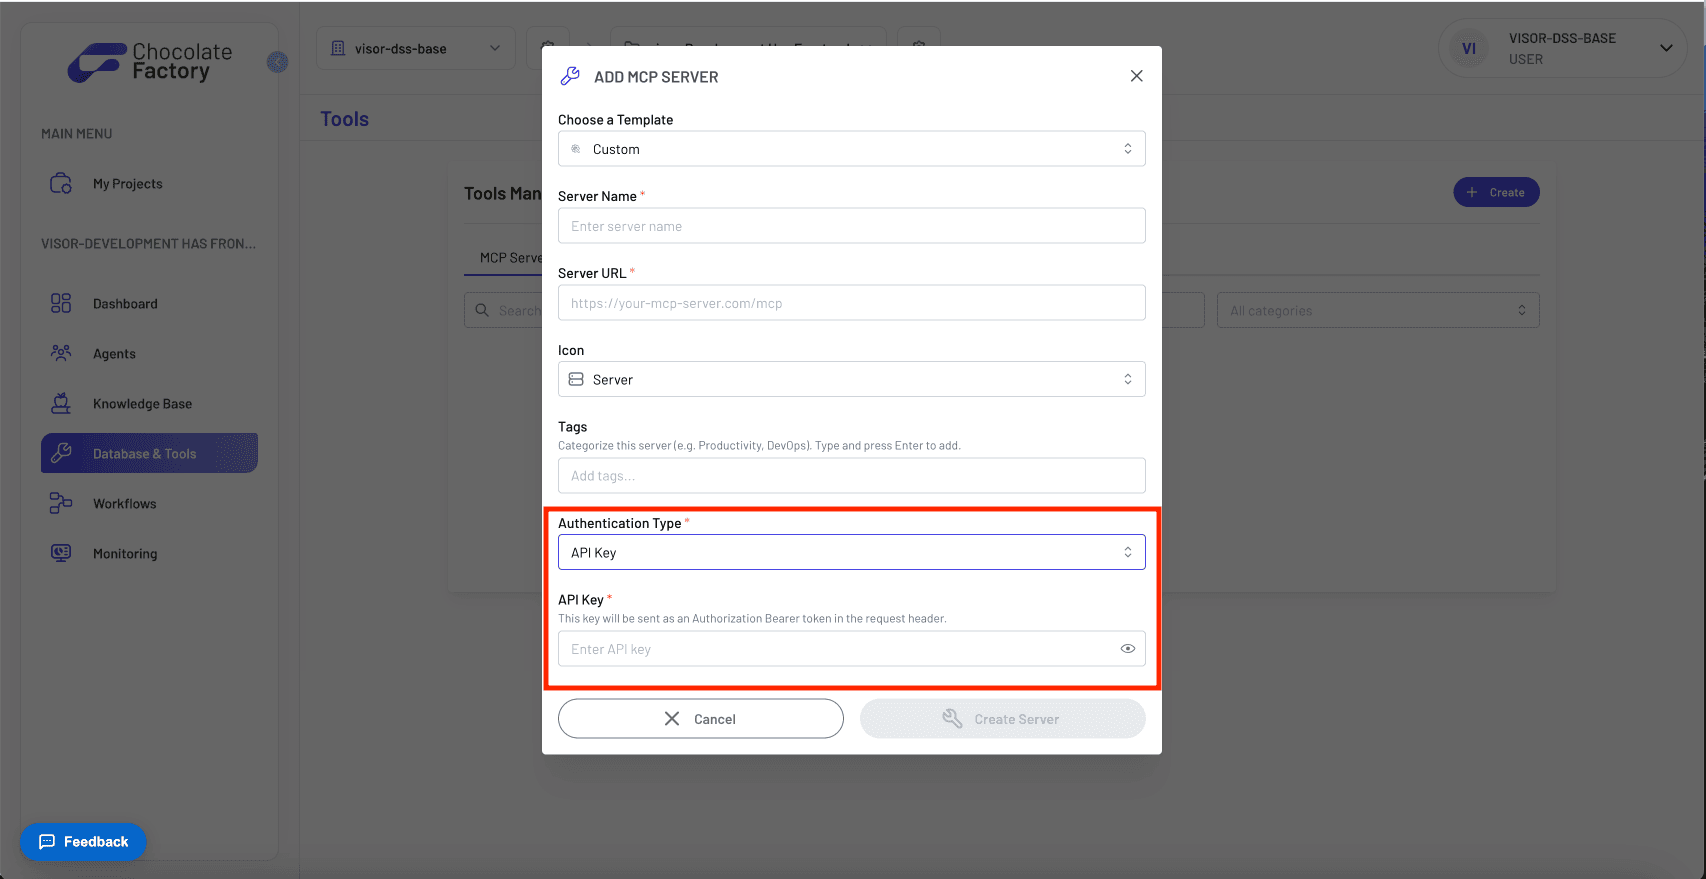
The API key is the read-only static token (Site Reader Token) of your site in Visor. To get it:
- Go to Settings (click your profile icon at the top-right corner → Settings). Jump to step
- In the sidebar, click Sites.
- Click on the site item to open its detail page.
- In the site detail, locate the Site Reader Token.
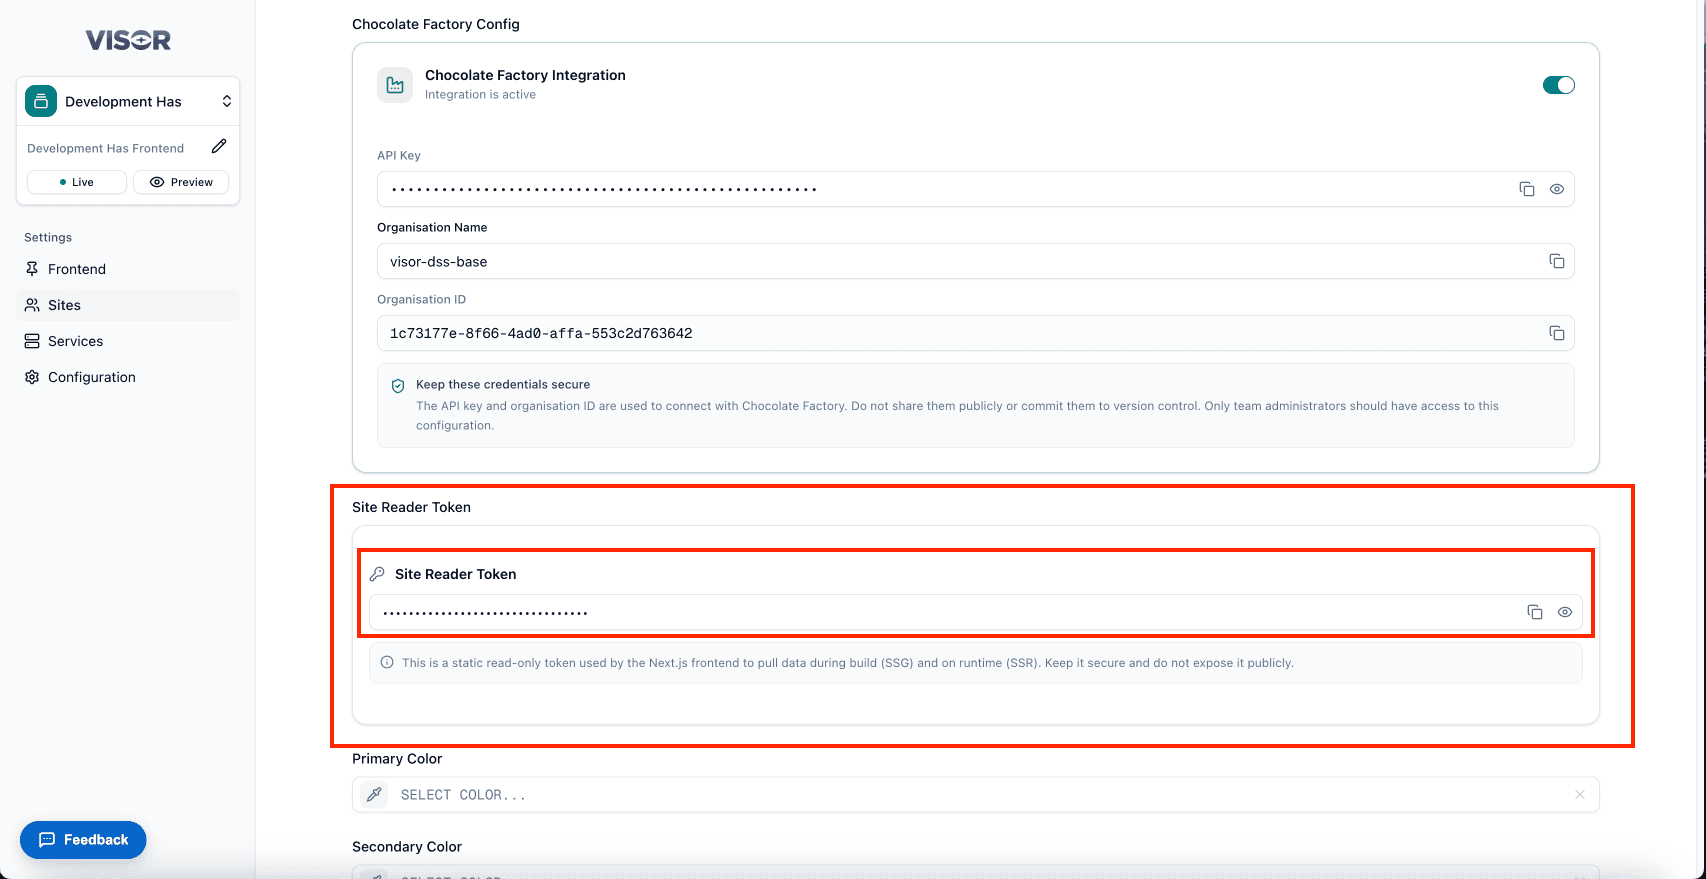
Copy the Site Reader Token and paste it into the API Key field in the Chocolate Factory form, then click Create.
Create an Agent
Once the MCP server is configured, navigate to Agent in the Chocolate Factory sidebar and create a new agent. Fill in all the necessary form fields to define your agent’s behavior and personality.
Assign the MCP Server to the Agent
After creating the agent, go to the agent detail page and navigate to the Tools tab.
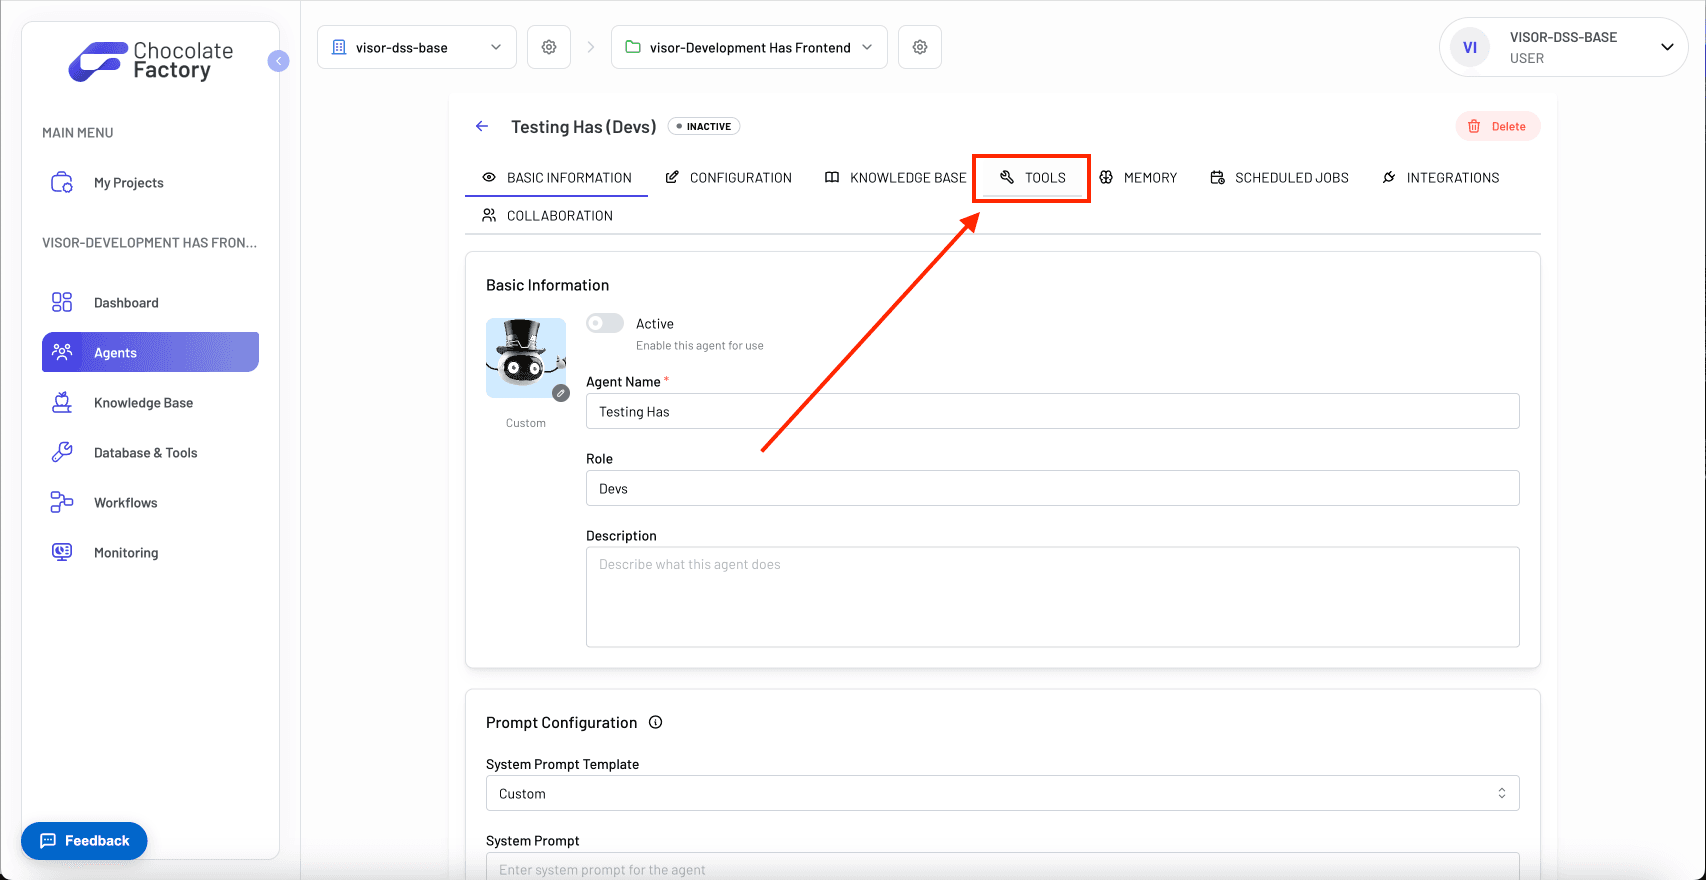
In the MCP Server section, click Add Server and select the MCP server you created in the previous step.
Activate the Agent
In the agent detail page, click the Active toggle (located beside the agent profile picture) to activate the agent. Save your changes.
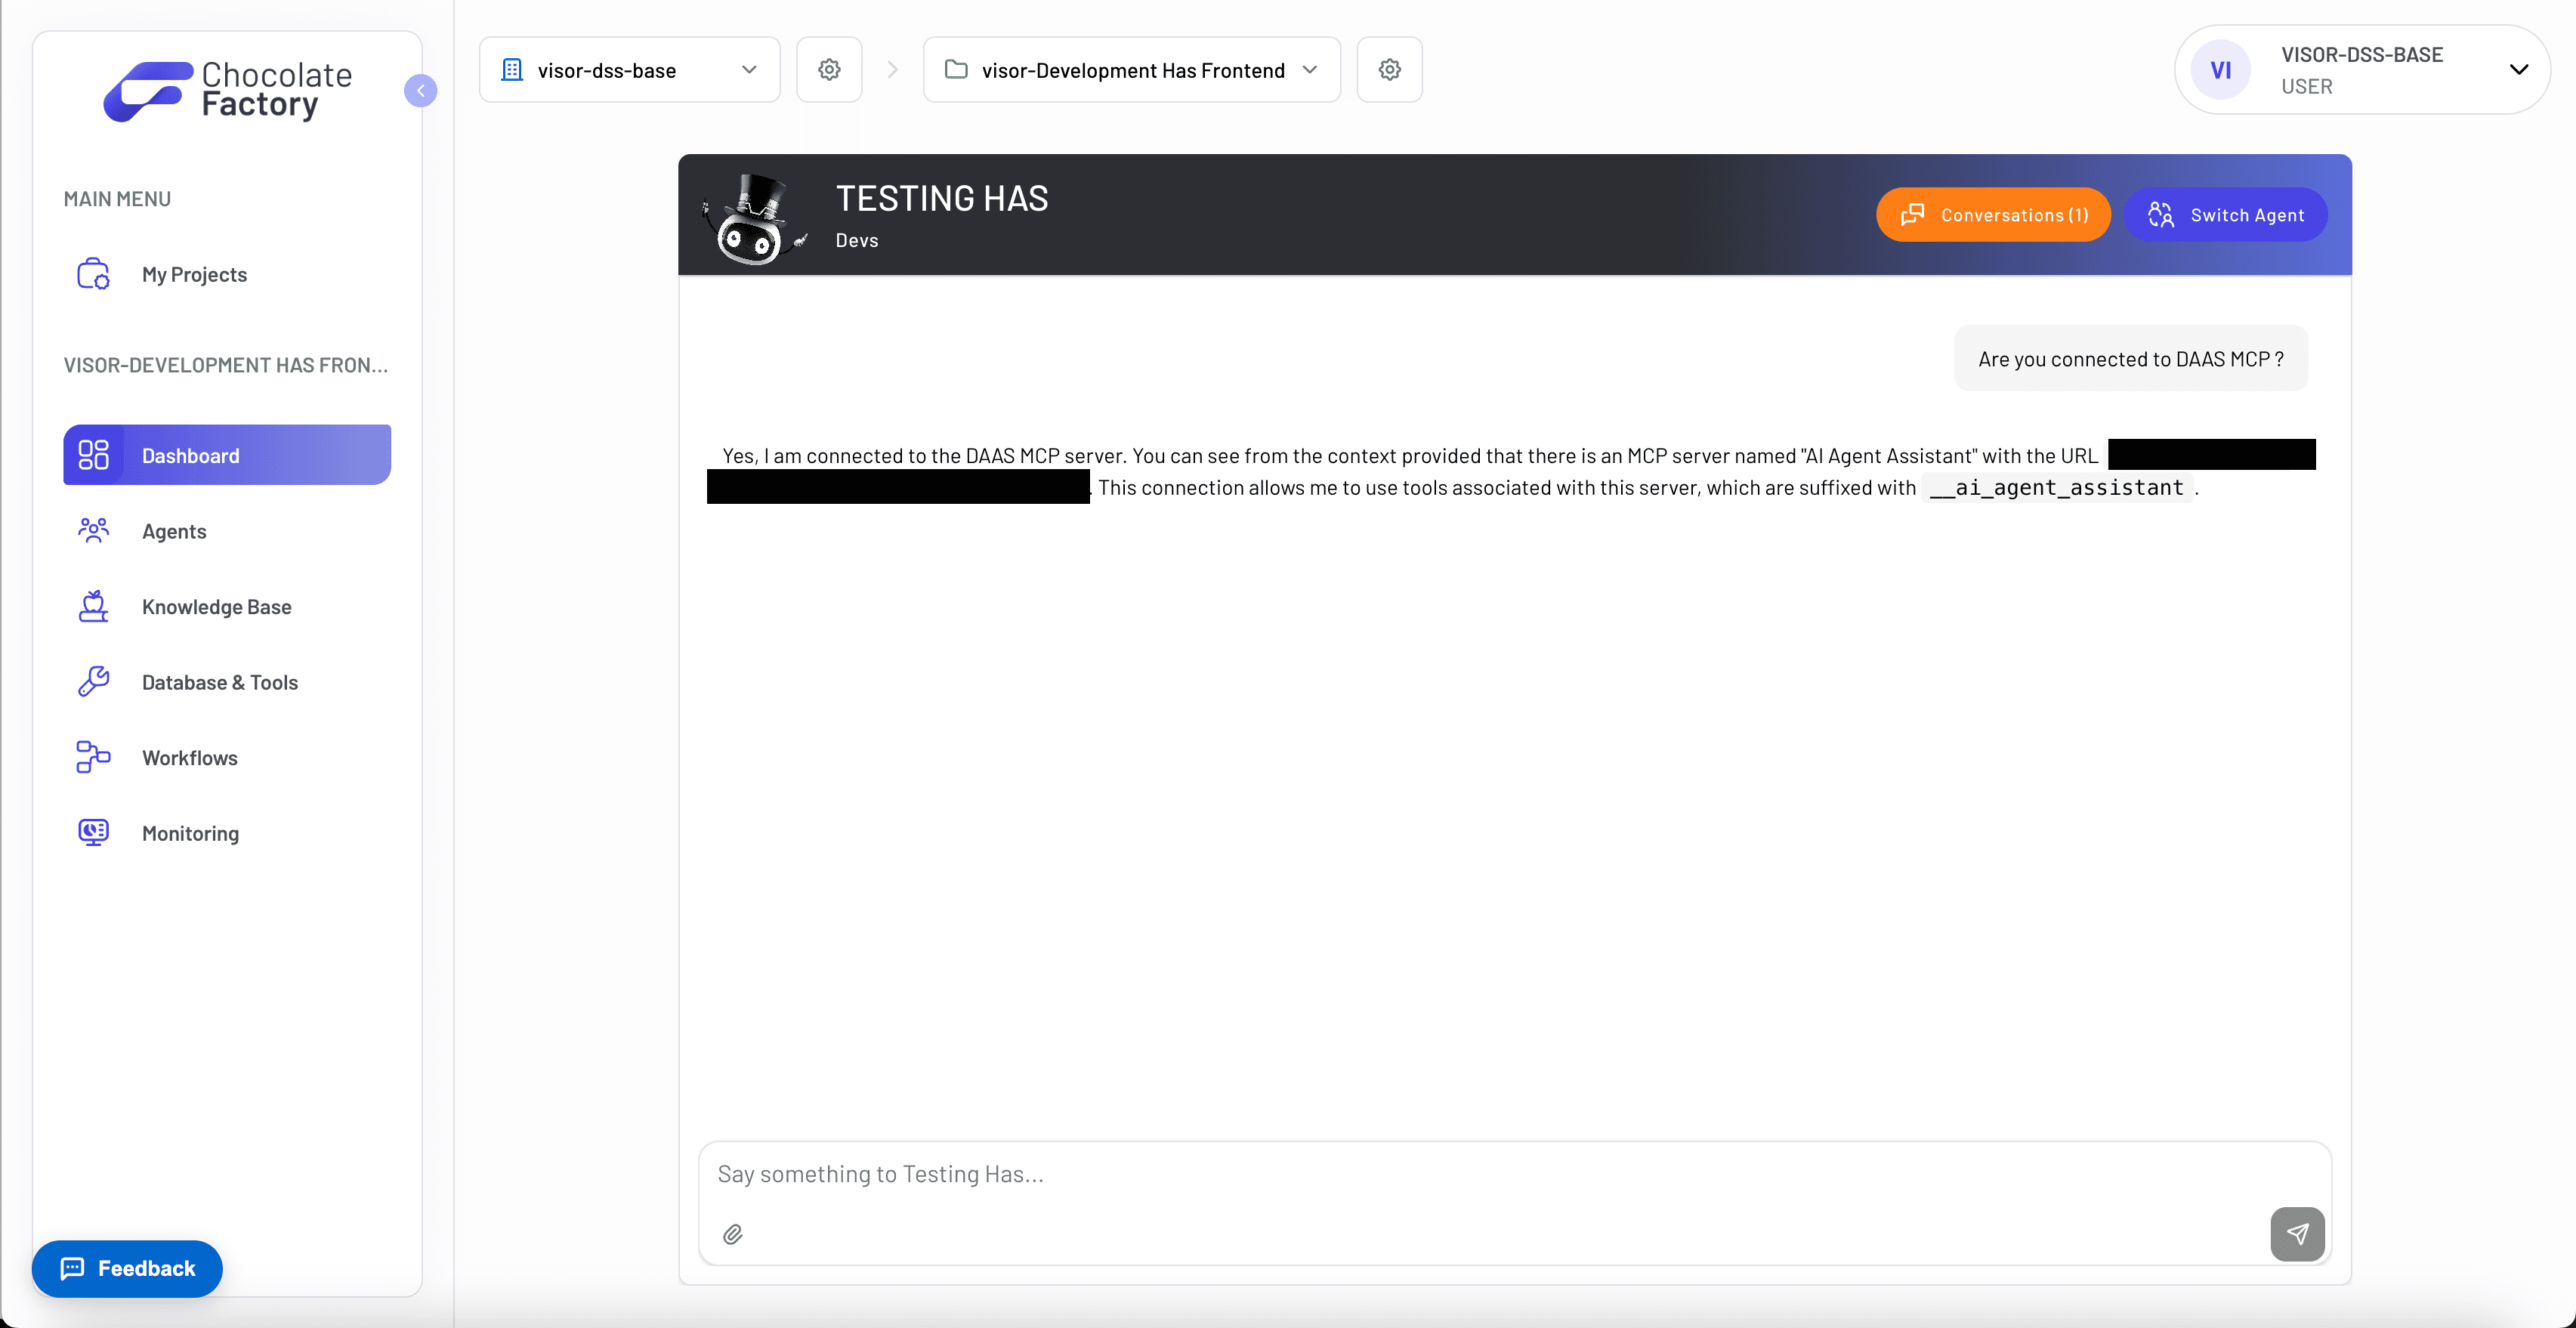
You can now go to the Chocolate Factory dashboard to test your MCP connection and verify everything is working correctly.
Register the Agent in Visor
Once the agent is active, you need to register it in Visor so that the widget can use the agent.
- In the agent detail page in Chocolate Factory, go to the Integrations tab.
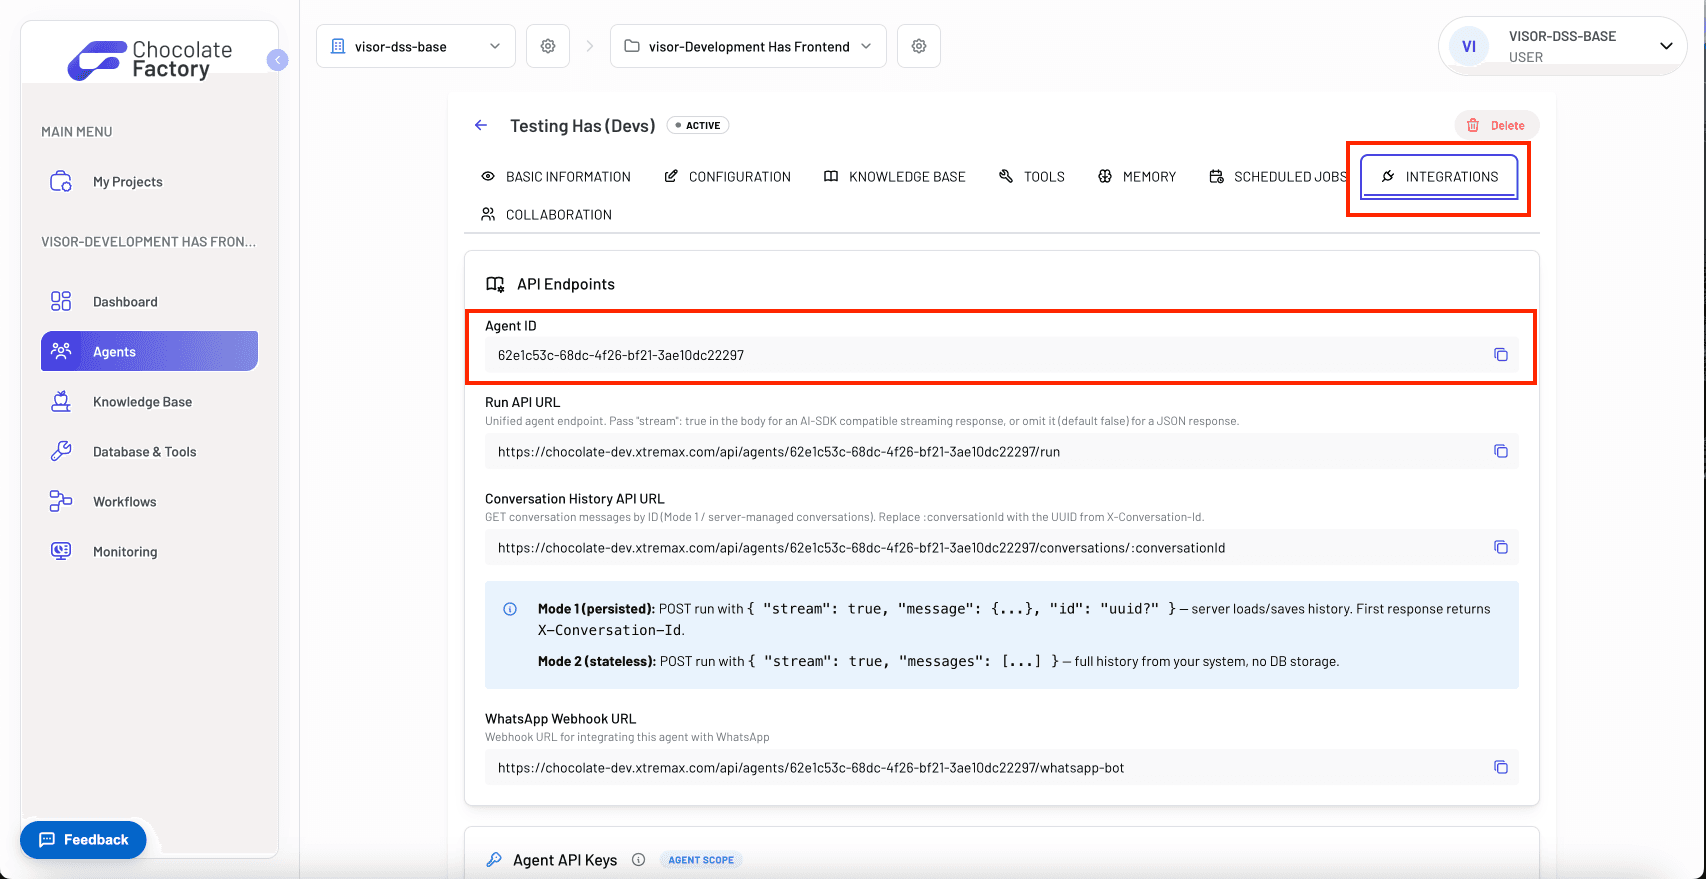
- Copy the Agent ID.
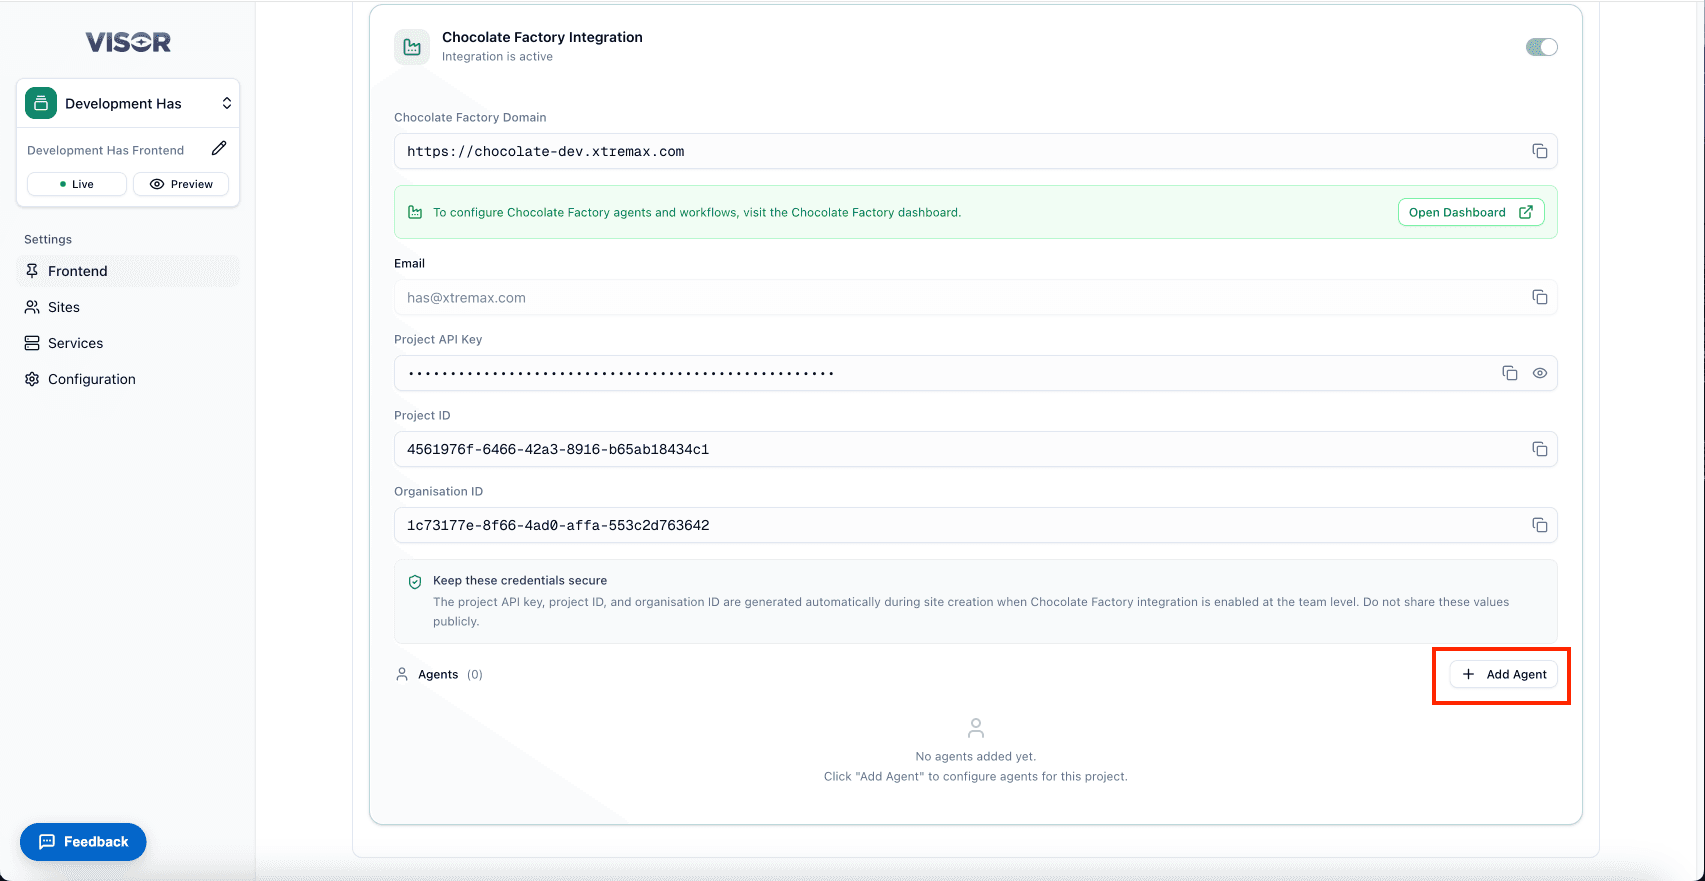
- Navigate back to Visor and go to the frontend detail page (follow the same steps as in How to Check).
- Click Add Agent, paste the Agent ID you copied from Chocolate Factory, and fill in a suitable name for the agent.
- Save the frontend detail page.
That’s it! Your widget is now connected to the Chocolate Factory agent. You can start building and customizing the widget in your frontend to leverage the AI agent’s capabilities.